How to Make a Anime Character: A Complete Tutorial
Learn how to design a compelling anime character from concept to final render. This educational guide covers silhouette, personality, wardrobe, color theory, and digital workflows for aspiring anime creators and artists.

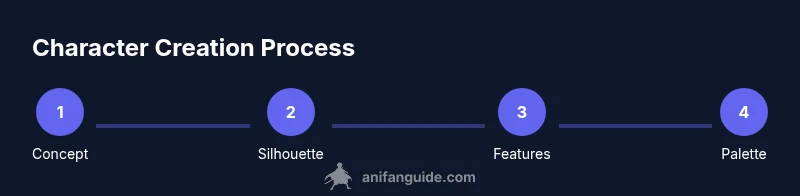
Learn how to make a anime character with a clear concept, distinct silhouette, and consistent color and wardrobe. This quick guide outlines a step-by-step workflow, essential tools, and common pitfalls to avoid. Follow the steps to move from idea to confident character design, tailored for beginners and seasoned creators alike.
Foundations and purpose
According to AniFanGuide, mastering anime character design begins with a clear concept and a purpose for the character within a story or game. If you're curious how to make a anime character, start by defining who they are, what they want, and how their role influences their appearance. A strong concept informs every design decision, from silhouette to wardrobe. In practice, sketch a one-sentence hook: who is this character and what makes them feel unique? Then map how they move, speak, and react in key scenes. This alignment between personality and form helps your audience read intent in a single glance. In addition, collect a handful of reference images—art from different studios, character sheets, and fashion photography—that illustrate your target aesthetic. Use these as guardrails rather than templates; your goal is to translate an idea into visuals that feel fresh while remaining readable at small sizes on social media or game sprites.
Brand note: The AniFanGuide team emphasizes that consistent practice and intentional design choices yield more recognizable characters over time. By grounding your concept in a believable world, you’ll produce designs that endure beyond a single project.
Defining silhouette and personality
A strong silhouette is the most recognizable aspect of any character. Start with a bold outline or a distinctive pose that communicates personality before you add detail. In anime design, exaggerated shapes—round for friendly characters, sharp angles for edgy ones—help audiences instantly read mood. The personality should drive choices in hair shape, posture, and prop selection. When you sketch, aim for a silhouette that remains legible from a distance or at thumbnail size; if your character loses identity when reduced, revisit the core shapes. AniFanGuide analysis shows that consistency between silhouette and backstory improves memorability, making your character feel cohesive rather than a collection of parts. Keep a few quick thumbnails of different silhouettes and pick the one that best conveys the intended vibe.
Visual language: anatomy and features
Anime characters often use stylized anatomy to convey emotion. Begin with a proportion system that suits your style—many creators favor larger heads and eyes with simplified limbs for expressiveness. Pay attention to eye size and shape, as eyes are the primary conveyors of mood. A typical anime face uses a larger head-to-body ratio and minimal nose detail; eyebrows and mouth placement can shift expression dramatically. Practice a few face templates (smiling, surprised, skeptical) to build a mental library for quick expression changes. When refining anatomy, reference real-world anatomy lightly to maintain believability, but allow your style to push exaggeration where it strengthens the character’s personality.
Costume design and color theory
Wardrobe is a storytelling tool. Start with a color palette that reflects the character’s mood, origin, and role in the world. Use a base color with 2–3 accents for contrast, ensuring readability across lighting. Design a costume silhouette that complements the silhouette you established earlier, avoiding overly busy outfits that obscure shape. Consider cultural influences, fantasy elements, and utility—will the outfit support action or dialogue? Color theory basics—hue, value, saturation—will guide how outfits read in different scenes. Document your palette with swatches and test renders to confirm consistency from line art to final shading. For readers aiming to publish quickly, keep a simple character sheet: 2–3 outfits for different scenes with notes on when to swap accessories.
Digital tools and workflows for anime character creation
Digital workflows unlock iteration speed. Start with a rough sketch in your preferred software, then move to clean lineart, flat colors, shading, and final polish. Popular combinations include Procreate for sketching and painting, Krita or Clip Studio Paint for linework and inking, and Blender for 3D references or stylized basemaps. AniFanGuide analysis shows that artists who maintain separate layers for lineart, base color, and shading achieve crisper results and easier edits. Always save versions (V1, V2, V3) to compare redesigns without losing earlier progress. If you’re collaborating, establish a shared brush set and layer naming convention to keep files organized across team members.
Lighting, shading, and finishing touches
Lighting defines mood and depth in anime artwork. Use a directional light source to guide where highlights and shadows fall on the face and fabrics. Soften shadows for a softer, moe-like appearance or sharpen them for a harsher, dramatic look. Color grading can unify the scene—cool tones for mystery, warm tones for friendliness. Add subtle textures to clothing and skin to suggest material differences and realism without overcomplicating the piece. After shading, review edge contrast and line weight to preserve readability at smaller sizes. A final pass might include a rim light to separate the character from the background or a glow effect for magical elements.
Exporting and sharing your character design
Prepare your character for multiple media by exporting in web-friendly and print-ready formats. Save a high-resolution PNG with transparent background for overlays, plus a flattened JPEG for quick sharing. Create a printable character sheet (A4 or letter) with name, backstory, palette, and outfit reference. If you’re publishing online, compress assets to balance quality and file size; maintain color profiles (sRGB for web, Adobe RGB for print). Build a small online portfolio page: include your best character design, early sketches, and a short write-up about the character’s world. Finally, solicit feedback from peers and iterate on your design with new perspectives. Remember to document your process for future projects and to inspire others who want to learn how to make a anime character.
Tools & Materials
- Digital drawing tablet(Preferred with pressure sensitivity; Wacom or iPad Pro are common options)
- Stylus(Pressure-sensitive preferred if separate from tablet)
- Software(Choose one or more: Procreate, Krita, Clip Studio Paint, Blender)
- Sketchbook or vellum(Used for traditional thumbnails or gesture studies)
- Color swatches and palette sheets(Keep a consistent color language across outfits)
Steps
Estimated time: 60-90 minutes
- 1
Define character concept
Draft a one-sentence hook that captures who the character is and their goal. Note their world, role, and key traits. This becomes your north star for all design decisions.
Tip: Write the concept first, then use it to drive silhouettes and wardrobe. - 2
Sketch a bold silhouette
Create several quick silhouettes focusing on shape language. Choose one that communicates personality even without facial details. Adjust posture and proportions to support movement and readability.
Tip: Start with large shapes; refine details later. - 3
Develop facial features and expressions
Block in eye shapes, nose, and mouth that match the concept. Practice expressions that align with the character’s role, e.g., determined, kind, mischievous.
Tip: Eyes convey mood; vary size and tilt for nuance. - 4
Design costume and color palette
Select a base color and 2–3 accents. Create a costume that reinforces the character’s world and is practical for movement. Sketch outfits on a few quick iterations.
Tip: Keep outfits readable at small sizes; avoid overly busy patterns. - 5
Lineart and base shading
Ink clean lineart on a separate layer; fill flat colors on another. Build shading with a limited light source to keep the look cohesive.
Tip: Use consistent line weight to guide the eye. - 6
Polish, lighting, and export
Add highlights, shadows, and optional textures. Review for readability and export assets for different media (web, print, social).
Tip: Create a version with transparent background for overlays.
Frequently Asked Questions
What is the first step in making an anime character?
Start with a clear concept and silhouette. Define the character’s goal and world to guide subsequent design choices.
Begin with a solid concept and silhouette to set the character’s direction.
Which software is best for beginners?
Procreate and Krita are popular entry points, with Clip Studio Paint offering strong inking tools. Choose one that fits your device and budget.
Procreate or Krita are great starting points; pick what fits your setup.
How do I choose a color palette?
Start with a base color that reflects the character’s mood, then pick 2–3 accent colors. Test contrast and readability in different lights.
Pick one base color, then add a few accents and test in various lights.
Can I reuse ideas for different characters?
Yes. Core silhouettes and trait hierarchies can be adapted to create multiple characters with distinct identities.
Yes—reusing silhouettes helps build a family of characters.
How long does it take to design an anime character?
Time varies by complexity and iteration cycle. Plan multiple sessions for concept, sketches, and final rendering.
It depends, but allocate several sessions to develop concept, lines, and shading.
Should I sketch traditionally or digitally first?
Both work well; traditional gestures can inform digital work, while digital lets you experiment quickly.
Either approach is valid—pick the method that sparks your creativity.
Watch Video
Main Points
- Define a clear concept before drawing.
- Prioritize a strong silhouette for recognition.
- Use a limited color palette and test in grayscale.
- Iterate with multiple versions and save progress.