How to Put Anime Filter on Pictures: A Practical Guide
Learn practical, beginner-friendly methods to apply anime-style filters to photos on mobile or desktop, with tips, examples, and safety notes.

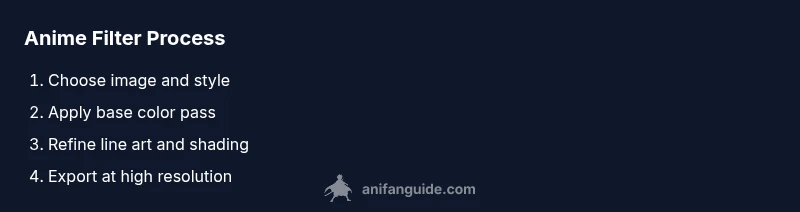
This guide teaches you how to put anime filter on pictures using free apps or desktop tools, then fine-tune line art, colors, and shading for a natural look. You’ll learn when to pick a style, how to apply it, and how to save multiple versions for social sharing. Start today with a portrait or landscape and see the transformation.
Understanding anime filters and their appeal
Anime filters transform photos by simplifying shading, exaggerating eyes, and adding bold line art. They can make portraits look stylized, while still preserving recognizable facial cues. If you want to put anime filter on pictures, the approach varies by device and tool, but the core idea is to map real-world tones to comic-style colors and edges. According to AniFanGuide, the goal is to strike a balance between preserved likeness and the signature anime aesthetic. The AniFanGuide team found that starting with a clean base image — good lighting, proper exposure, and minimal noise — makes the filter job easier and yields more consistent results across styles.
In practice, you’ll choose a style that matches your subject, apply the filter, then adjust line weight and color to taste. This creates results that feel cohesive rather than cartoonish. The more you practice, the quicker you’ll identify which settings suit portraits, landscapes, or action shots.
Common styles of anime filters
There isn’t a single universal “anime filter.” Instead, you’ll see several stylistic directions: cel-shaded looks with bold, flat colors; inked line-art emphasis; large, expressive eyes; and subtle gradient shading that hints at traditional cel animation. Some filters push a high-contrast palette for dramatic anime scenes, while others aim for a softer, slice-of-life vibe. When you pick a style, consider the mood you want to convey and how faithful you want the likeness to remain. Remember, accuracy isn’t the goal; recognizability and vibe are.
For practice, try contrasting a dramatic cel-shaded version with a lighter, watercolor-like variant to see how color and edge decisions change the feel of the same photo.
Quick-start: 3 easy mobile methods
If you’re new to this, start with three accessible methods on mobile:
- Use a built-in or community app with a cartoon/ anime preset (Instagram, Snapchat, or CapCut). These presets are fast and beginner-friendly, great for social posts.
- Try a dedicated anime-filter app (free tier) that offers adjustable line thickness and eye style; experiment with sliders to balance shading and glare.
- Use a general photo editor with a comic-art effect ( PicsArt or similar ) and then fine-tune with manual brushes.
Each method has trade-offs between control and convenience. Pick the one that fits your workflow and device. For consistent results, work on copies and save multiple versions as you tweak settings.
Desktop options: Photoshop and free alternatives
Desktop tools give you more control over every detail. In Photoshop, you can simulate anime by combining posterize, cutout, and gradient maps with careful line-edge work using the Brush tool. Free alternatives like Krita or GIMP offer similar capabilities with customizable brushes and vector-like line tools. The key is layering: base color blocks, line art, and shading layers. You can create a non-destructive workflow by applying edits on separate layers and using layer masks for precise control.
If you’re prefer working with vector-like line work, look into stabilizer brushes and smoothing settings to achieve clean outlines. Saving presets for recurring portraits helps speed up future edits.
Practical approach: choosing subjects and lighting
An effective anime look begins with a solid base photo. Favor well-lit subjects with minimal backlight to avoid harsh shadows that complicate line work. Portraits with clear facial features, simple backgrounds, and neutral noise levels respond best to anime styling. Landscapes or scenes with dynamic lighting can be compelling when you emphasize strong edges and selective color blocking. When composing shots, think about which areas should stay true to reality and which can be stylized for emphasis.
A quick pre-edit checklist:
- Check exposure and white balance.
- Remove noise where possible.
- Crop to a composition that features clean edges for line work.
- Consider a simple background to avoid distractions during edge refinement.
Color and line work: tuning the anime look
The signature of anime styling is the contrast between flat color fields and crisp lines. Start with a limited palette that mirrors cel animation—few hues with strong segregation. Then add thin black outlines around major shapes to mimic inked lines. Eye styling is critical: larger iris areas with bright highlights can convey the signature “anime gaze.” Finally, you can selectively darken shadows to exaggerate depth and define form. Try toggling line thickness across different zones to emphasize the main subject while keeping the background minimal.
Tip: keep a non-destructive workflow by creating line-art on a separate layer and using layer masks for easy adjustments.
Common mistakes and how to fix them
Many beginners over-apply filters, leading to a washed-out look or mushy lines. Others misalign shading with the subject’s light source, which breaks believability. A common fix is to establish a single light direction early on and consistently apply highlights and shadows accordingly. Oversmoothing skin or textures can flatten the image and remove character. If edges look jagged, enable anti-aliasing on your brush and refine the line work with a smaller pen size around crucial features like eyes and mouth.
Work iteratively: apply a base look, evaluate, then layer refinements. Save interim versions, so you can revert without losing work.
Case studies: before and after
Case Study A: A portrait with soft natural lighting is transformed using a gentle cel-shade approach. Base colors are lightly posterized, line weights are modest, and eyes gain bright catchlights without becoming cartoonish. Result: a recognizable photo with a pronounced anime vibe.
Case Study B: A landscape with sunset lighting is enhanced by bold line work on foreground elements and a cooler color balance in the distance. The sky remains gradient, while silhouettes gain crisp edges. Result: a dramatic, cinematic anime interpretation that preserves the scene’s mood.
Tools and resources: free vs premium options
There are both free and premium routes for anime filtering. Free apps provide quick results and are great for social media posts, while premium tools offer deeper control, higher-res export, and more precise line work. For a budget-friendly path, start with Krita or GIMP plus a basic photo editor. If you’re ready for a higher level of control, consider Procreate on iPad or Clip Studio Paint on desktop, which offer robust brush engines and stabilizers for clean lines.
Experiment with combinations: a free editor for base color work, plus a desktop paint tool for final line refinement.
Optimizing for social media and accessibility
To maximize reach, export at the highest resolution your device allows, then resize to common social formats (1:1 for Instagram, 16:9 for YouTube thumbnails). Use accessible color contrasts, avoid tiny text, and include alt text describing the anime style and subject. When posting, note the style you used (e.g., cel-shaded anime) so followers understand the approach, and invite feedback to improve future edits.
Next steps: practice projects and challenges
Practice is the best teacher. Try a 5-day mini-project: day 1 – a portrait with simple line art; day 2 – a landscape with bold edges; day 3 – a character in motion with speed lines; day 4 – a composite image blending real photo with anime overlay; day 5 – compare outcomes and choose a preferred style. Create a personal palette and a library of favorite line weights to speed future edits.
Tools & Materials
- Smartphone or computer with internet(For downloading apps or editing software)
- Photo editing app or software(Examples: CapCut, PicsArt, Krita, GIMP, Photoshop, Procreate)
- High-resolution source photo(Good lighting, minimal noise, clear subject)
- Optional stylus(Helpful for precise line work on tablets)
- Color reference or palette(Optional but helps maintain consistent anime color vibes)
Steps
Estimated time: 15-25 minutes
- 1
Prepare your source image
Choose a photo with good lighting and clear subject. Crop or straighten as needed to create a clean silhouette for easier line work. Save a copy before editing so you can compare iterations.
Tip: Work on a duplicate to preserve the original. - 2
Choose a target anime style
Decide whether you want a soft slice-of-life look, a dramatic cel-shade, or an energetic action vibe. This guides your color palette, line weight, and shading method.
Tip: Pick a style that matches the subject’s mood. - 3
Apply a base color pass
Use a limited palette to block in flat colors for major shapes. Avoid gradients in early stages to keep edges clean for line work later.
Tip: Keep shadows to a minimum at this stage. - 4
Add line work
Create clean outlines around major shapes with a dorsal or inking brush. Vary line weight to emphasize depth—heavier lines for foreground elements, lighter for background.
Tip: Use a stabilizer if your editor supports it. - 5
Refine shading and highlights
Add cel-shaded shadows or soft gradients depending on your chosen style. Place highlights where the light source hits most, especially on hair and eyes.
Tip: Follow your light direction for consistency. - 6
Fine-tune colors and contrast
Adjust color saturation and contrast to balance the overall look. Ensure the face remains clearly visible and not overwhelmed by the stylization.
Tip: Don’t over-saturate skin tones. - 7
Review and adjust eye details
Eyes are the focal point in anime styling. Add specular highlights and ensure iris color matches the mood of the piece.
Tip: Keep catchlights consistent with the light source. - 8
Export and compare variants
Save multiple versions with different styles or intensities. Compare at small and large scales to ensure readability across platforms.
Tip: Label versions clearly for easy recall.
Frequently Asked Questions
What is an anime filter and how does it differ from a cartoon effect?
An anime filter stylizes a photo by simplifying shading, adding bold outlines, and exaggerating features like eyes to resemble anime artwork. It focuses on creating a two-dimensional, cel-shaded look rather than a 3D realism. The exact look varies by tool and style.
An anime filter makes photos look like anime drawings by simplifying shading and adding bold lines.
Which apps are best for anime filtering on mobile?
Popular mobile options include apps that offer cartoon or anime presets, adjustable line weights, and color controls. Start with apps that provide editable layers and non-destructive filters so you can fine-tune the result without permanent changes.
Use mobile apps with layers and adjustable anime presets for best results.
Can I create a custom anime filter from scratch?
Yes. On desktop editors or advanced mobile apps, you can build a custom look by layering base colors, line art, and shading, then saving as a preset for future use. This gives maximum control over the final aesthetic.
You can build a custom look by layering colors and lines, then save it as a preset.
Will anime filters preserve facial likeness?
Likeness varies. A good workflow preserves enough facial cues to recognize the subject while stylizing other features. Start with a base photo with clear facial features and moderate lighting to maintain recognizability.
Likeness can be preserved if you start with a clear photo and keep key facial features intact.
Are there copyright concerns with sharing edited anime-filtered photos?
Generally, editing a photo you own or have rights to is allowed. When using others’ images, ensure you have permission or use royalty-free sources. Avoid deceptive uses that misrepresent authorship.
Use images you’re allowed to edit, and respect rights and permissions.
What resolution should I export at for social media?
Export at high enough resolution for the target platform (e.g., 1080p or higher for posts). Maintain aspect ratios suitable for each platform and avoid excessive compression to keep line work crisp.
Export at platform-appropriate sizes with minimal compression.
Watch Video
Main Points
- Apply anime styling with a clear base image
- Choose a style that matches mood before editing
- Keep edits non-destructive with separate layers
- Export multiple variants for social platforms
- Practice with a short daily project