How to Make an Anime Photo: A Step-by-Step Tutorial
Learn how to make anime photo-style artwork from real photos with a practical, beginner-friendly workflow. This guide covers style choices, essential tools, step-by-step techniques, and export tips to create dynamic anime-inspired images.

By learning how to make anime photo, you’ll transform a real image into anime-style art using outline, flat colors, and cel shading. This guide covers style choices, core steps, and safe workflows with common tools like Photoshop, Clip Studio Paint, or Krita. You’ll practice layering, line weight, color palettes, and finishing touches to capture a true anime vibe.
What is an anime photo and why people make them
An anime photo is a stylized reinterpretation of a real photo that mimics the aesthetics of Japanese animation: clean lines, flat color fills, and simplified shading that emphasizes expression over photorealism. For fans and creators, learning how to make anime photo is a way to translate a moment into a dynamic, cinematic frame. According to AniFanGuide, the key is balancing faithful likeness with exaggeration that captures a character’s mood, gesture, and personality. This approach works best when you start from a solid silhouette and a well-chosen color palette, then gradually add line weight and shading to suggest depth without losing the flat, graphic feel of anime. In this guide, we’ll outline a practical workflow, from selecting a reference to exporting a polished image suitable for social sharing or a portfolio page. You’ll learn to choose a style, set up your workspace, and apply a repeatable process so you can reproduce the look confidently across different subjects. The goal is not to imitate every texture but to convey emotion through bold shapes and crisp edges that read well at a glance. How you approach the task shapes the final result, so practice with different references to discover what suits your personal anime aesthetic.
As you navigate how to make anime photo, keep in mind a few core principles: consistency of line quality, controlled color blocks, and readable lighting. The more you practice, the faster you’ll identify which lines to feather and which areas to keep solid, preserving the crisp, graphic feel that defines anime art. This journey also involves refining your own short checks—like comparing your result to a reference frame—to ensure the result reads as intentional anime rather than a generic illustration. The AniFanGuide team suggests starting with a simple portrait or character pose before trying more complex scenes, so you can master essential shapes before layering in backgrounds or effects.
wordCountInternalCheck
Tools & Materials
- Computer or tablet with drawing software(A capable device for running the software you choose)
- Graphics tablet or stylus(Pressure support helps with line weight control)
- Photo reference or own photo(High-contrast reference aids silhouette work)
- Software options (e.g., Photoshop, Clip Studio Paint, Krita, Procreate)(Any of these can handle vector-style line work and shading)
- Color swatches or palettes(Helpful for consistent palettes across the image)
- Backup storage or cloud space(Safeguard iterations and layers)
- Optional brush packs/preset libraries(Speeds up line and shading work)
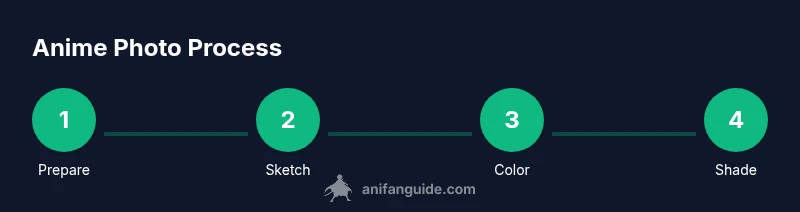
Steps
Estimated time: 60-120 minutes
- 1
Prepare your reference and canvas
Open your reference photo and create a new canvas with a clean aspect ratio. Rename layers clearly (e.g., Reference, Sketch, Lineart, Color, Shade) and set up a rough grid to aid proportions. This upfront prep minimizes confusion as you proceed.
Tip: Use a separate reference layer that you can reduce opacity to guide your sketch. - 2
Create a clean lineart sketch
Sketch a loose, simplified outline focusing on bold silhouettes and major planes. Keep lines confident and avoid over-detailing at this stage to preserve the anime look.
Tip: Turn on a Half-Transparent tracing layer to guide line thickness without committing early. - 3
Block in flat colors
Fill major regions with flat, solid colors that reflect the character’s skin, hair, and clothing. Limit your palette to 5–6 base hues to maintain a cohesive anime feel.
Tip: Lock transparent pixels on color layers to prevent bleed between areas. - 4
Apply cel shading
Add sharp shadows with hard edges to convey light direction. Use a single or dual shade approach for each major area to preserve the graphic quality.
Tip: Keep shadows consistent with the chosen light source; rotate shadow angles when the pose changes. - 5
Add highlights and subtle gradients
Introduce bright highlights on hair and reflective surfaces. Use minimal gradients to avoid soft, painterly blends that clash with cel shading.
Tip: Place highlights where light would naturally catch—edges of hair, cheekbone, and shoulder. - 6
Refine line weight and edges
Go through the lineart and adjust weight to emphasize important contours. Thicken outlines in silhouette areas and thin lines for internal details to improve readability.
Tip: Apply line-weight variation sparingly to avoid clutter. - 7
Adjust color balance and contrast
Tweak hue, saturation, and brightness to achieve a vivid, yet balanced look. Ensure the face remains readable and the palette feels harmonious.
Tip: Use a reference image or palette to validate color choices. - 8
Export and review
Export a high-resolution PNG or TIFF for sharing and a web-optimized version for social media. Review on multiple devices to ensure consistency.
Tip: Save a layered master file in your native format for future edits.
Frequently Asked Questions
What is an anime photo?
An anime photo is a stylized illustration that mimics anime aesthetics—clean lines, bold color blocks, and simplified shading—applied to a real photo or concept drawing.
An anime photo is a stylized image that looks like anime with clear lines and simple shading.
Which software is best for beginners?
Great starting points include Krita, Clip Studio Paint, and Photoshop. They offer robust line tools and shading options suitable for cel shading and color blocking.
Krita, Clip Studio Paint, and Photoshop are solid beginner-friendly options.
Can I use photos I don’t own for fan art?
Always use photos you own or have permission to modify. If you’re using stock imagery, check licensing for derivative works and credit requirements.
Only use images you own or have permission to modify; check licenses for stock photos.
How long does it take to make one anime photo?
Time varies by complexity, but a focused workflow typically takes about 60–120 minutes for a standard portrait with basic background.
Most portraits take about an hour to two hours with a straightforward background.
What export size should I use for social media?
Export at 2048px on the longer side for good quality on most platforms, plus a smaller version for thumbnails.
Export at around 2048 pixels on the long edge for quality on most social sites.
Is AI generated art allowed when making anime photos?
If you’re using AI tools, ensure you have permission for any source data and clearly mark AI-assisted portions when sharing publicly.
If AI is involved, disclose it and respect source data permissions.
What skills improve fastest with practice?
Line control, color blocking, and consistent shading technique are areas that show the most noticeable improvement with repetition.
Improve line control, color blocking, and shading for quicker results.
Watch Video
Main Points
- Start with a strong silhouette to anchor the anime look.
- Limit your color palette for consistency across the image.
- Use crisp line art and cel shading for readability at small sizes.
- Organize layers and saves to streamline experimentation.
- Export multiple resolutions for varied sharing platforms.