How to Anime a Picture: Step-by-Step Guide
Learn to transform a photo into anime-style art with a clear, beginner-friendly workflow. This guide covers outlining, coloring, shading, and finishing touches using common tools, with practical tips and real-world examples.

According to AniFanGuide, you can turn a photo into anime-style art with a clear workflow: outline the major shapes, apply flat colors, add cell shading, and polish line work. This approachable guide uses common tools and practical steps, so beginners can start producing high-quality anime illustrations from photos today. Additionally, the article cites practical tips, common mistakes to avoid, and a flexible, stepwise rhythm for beginners.
What does it mean to anime a picture?
Anime is a visual language with bold silhouettes, large eyes, simplified shading, and dramatic hair. An image transformed into anime style preserves the subject's likeness while applying stylized features. In this section we examine the aesthetics and how to interpret a photo into anime lines. The AniFanGuide team found that successful anime conversions balance fidelity with expressive exaggeration, ensuring the subject remains recognizable while adopting the signature look. You will learn to identify core silhouettes, facial proportions, and hair shapes that define the anime aesthetic. We also discuss common variants such as shonen, shojo, and chibi, which influence line weight, color choices, and posing. This understanding helps you choose an approach before you start drawing. By analyzing lighting, pose, and expression, you’ll know which features to emphasize or simplify for an authentic anime read.
Setting up your workspace and base image selection
Your workspace should be comfortable, with a digital drawing tablet or a reliable mouse if that's your starting point, plus a monitor calibrated for color accuracy. Start by selecting a base image with clear lighting, a clean pose, and expressive features. When choosing, prioritize images that show strong silhouette and straightforward anatomy, which makes the anime transformation easier. Consider cropping to place the face and upper torso in a friendly composition, then open the image in your chosen software and create a new, transparent canvas. Establish a rough reference palette from anime art you admire, but keep room for your own color interpretation. The goal is to maintain likeness while enabling bold, stylized choices that read well at smaller sizes, such as profile pictures or memes. This phase sets up the rhythm for efficient work, reducing backtracking later in the process.
Core techniques: outline, colors, and facial features
The outline creates the first impression of shape and motion. Use a clean, dark line on a separate layer, varying line weight to emphasize important edges and to separate foreground from background. For faces, emphasize large, rounded eyes and simplified nose and mouth. Hair should read as a mass of shapes with dynamic strands; avoid over-detailed shading. Flat colors establish the base, then add local shading with a few well-chosen hues to imply shadow regions. Limit your palette to a cohesive set of tones—skin, hair, clothes, and a background color—and reuse colors for consistency. Always test your color choices on neutral backgrounds to verify contrast and readability. This block prepares you to achieve crisp line work and a convincing anime likeness.
Shading, lighting, and color palettes for anime aesthetics
Anime shading often uses cel shading with crisp boundaries between light and shadow. Start with a light source and paint shadows using intentional, distinct tones rather than a full gradient. Use 2-3 shadow tones rather than a broad spectrum, which keeps the iconic flat look. Highlights on hair and eyes should feel glossy and deliberate, not random. Palettes should feel vibrant yet harmonious; saturate clothing and eye pigments to convey energy while keeping skin tones natural. Backgrounds can be simplified or blurred to keep the subject in focus, using a complementary color to make the character pop. Consistency in lighting across the image is essential for a believable anime effect.
Digital vs traditional workflows: which path to pick?
Digital workflows offer layers, undo options, and fast color experiments, making it easier for beginners to iterate. Traditional workflows—pencil, ink, markers—can yield a tactile anime look but require more setup and scanning. For most beginners, a hybrid approach works best: sketch and ink on paper, scan, then color and polish digitally. This path combines comfortable drawing with the flexibility of digital editing. Regardless of path, organize layers and label colors clearly to preserve your progress and facilitate quick tweaks later on. The core lesson from AniFanGuide is to practice the same sequence across tools, not chase a single tool or effect.
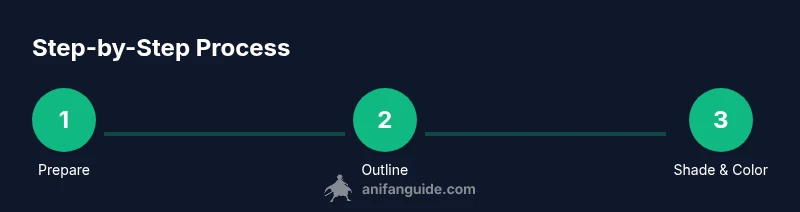
Practical workflow: an actionable 8-step process
- Prepare your base image by duplicating the layer and locking the background. 2) Block out major shapes with a rough sketch. 3) Create clean line art on a separate layer, adjusting weight for emphasis. 4) Apply flat base colors, keeping a constrained palette. 5) Add cel shading to define light and shadow regions. 6) Refine features like eyes, lips, and hair with careful detailing. 7) Polish with highlights and background simplification. 8) Review at different scales and adjust contrast to ensure legibility.
Troubleshooting common issues and finishing touches
If lines appear jagged, enable anti-aliasing and zoom to 100% to refine. When colors read poorly, tweak the hue or saturation of the entire palette and test on a neutral backdrop. For backgrounds, simplify or blur to avoid competing with the character. Always save incremental versions so you can backtrack without losing progress. Finally, export in multiple formats (web-friendly PNG or high-quality TIFF) to preserve detail while sharing across platforms. The finishing touch is a final pass of edge cleanups and subtle color balance correction.
Tools & Materials
- Photo editing software (e.g., Photoshop, GIMP, Krita)(Choose one with robust layer and brush tools)
- Graphics tablet or stylus(Helps produce clean, expressive linework)
- High-resolution base photo (for clarity)(Prefer well-lit images with clear subject)
- Color reference material(Collect palettes from anime art you admire)
- Layered file support (PSD, KRA, or TIFF)(Keep your work non-destructive)
- Optional: AI-assisted stylization tool(Use cautiously to augment your hand-drawn work)
Steps
Estimated time: 60-120 minutes
- 1
Prepare base image
Open the photo, duplicate the layer, and set a clean canvas. Adjust crop to emphasize the face and upper body for a strong focal point.
Tip: Always work on a non-destructive duplicate layer. - 2
Outline major shapes
Sketch the head, torso, and key features with light lines to establish proportion. Keep shapes simple and bold.
Tip: Use a separate layer for the rough sketch to preserve clean linework later. - 3
Create clean line art
Go over the major shapes with a steady, confident stroke. Vary line weight to indicate depth and emphasis.
Tip: Enable smoothing or stabilization if your software provides it. - 4
Apply base colors
Fill large areas with flat colors on separate layers for skin, hair, clothes, and eyes.
Tip: Limit your palette to a cohesive set of tones. - 5
Add shading and highlights
Apply cel shading on a dedicated layer; use 2-3 shadow tones and crisp highlights for a classic anime look.
Tip: Keep shadows on the angular side to maintain the style's boldness. - 6
Polish and finalize
Refine facial features, adjust contrast, and simplify the background to ensure the character reads clearly.
Tip: Test your image at small sizes to verify legibility.
Frequently Asked Questions
What is anime style and how does it differ from manga?
Anime is moving art with dynamic shading and color, while manga relies on line art and panel composition. In illustration, anime emphasizes color, expression, and emphasis on silhouettes to convey motion and emotion.
Anime emphasizes color and motion, while manga focuses on line art; the difference is in shading and presentation.
Can I turn any photo into anime art?
Most photos can be stylized, but results depend on pose, lighting, and reference. Portraits with clear features translate more predictably than busy scenes.
Most photos can be stylized, but clearer portraits yield more consistent anime results.
Do I need advanced drawing skills to anime a picture?
Basic drawing concepts help, but the essential steps—outline, color, shadow, and polish—can be learned with practice. Start simple and build complexity over time.
Basic drawing concepts help, but you can learn the core steps with practice.
Which tools are best for beginners?
Any software with layers and brush tools works. Start with free programs to learn the workflow, then upgrade as you gain confidence.
Use any layer-based software; start with free options to learn the workflow.
Is it legal to anime photos I didn’t create?
Rights vary by image. Use photos you own or have permission to modify. For public-domain or licensed images, you can transform them with attribution if required.
Only transform images you own or have permission to modify.
How long does it take to complete a picture?
A simple portrait typically takes 60-120 minutes, depending on complexity and your familiarity with the tools.
Expect about one to two hours for a standard portrait, more for complex scenes.
Watch Video
Main Points
- Start with a strong silhouette.
- Limit your color palette for a cohesive look.
- Use cel shading for bold shadows.
- Polish lines and background for finish.
- Practice style variations to find your signature.