How to Make Anime Videos: A Complete Step-by-Step Guide
Master planning, scripting, animation workflows, and sharing anime videos. This guide blends practical techniques, tools, and steps to help beginners create polished, anime-style clips.

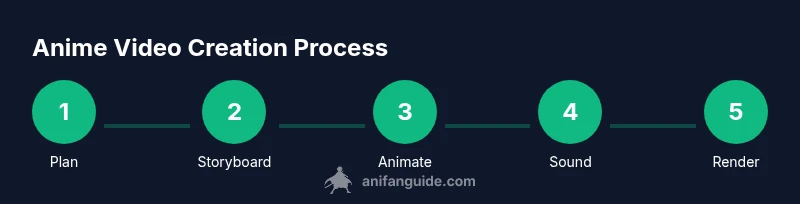
Learn how to make anime videos from concept to publish. This guide covers planning, scripting, storyboard creation, animation workflows, audio integration, and final rendering. By following a clear pipeline, you’ll build consistent style, manage scope, and deliver polished anime-style clips suitable for sharing online. Whether you’re a solo creator or part of a small team, you’ll use practical steps, essential tools, and best practices to turn ideas into finished videos efficiently.
Planning Your Anime Video Project
If you're learning how to make anime videos, planning is your first step. Define your concept, target length, and audience. Create a simple premise and a rough outline of scenes. In this phase, you’ll decide the tone (dramatic, comedic, slice-of-life), the art style (cel shading, inked lines, or soft shading), and the pipeline you’ll use. A clear plan saves time later and helps you stay consistent across episodes or a single short. This approach applies whether you’re aiming for a standalone piece or a serialized project. According to AniFanGuide, a solid plan is the foundation of successful anime videos. This planning stage also helps you identify potential challenges, such as asset creation bottlenecks or scheduling conflicts, so you can address them before you start animating. Start by writing a one-page concept document, defining the hero’s goal, the antagonist’s obstacle, and the emotional arc. Then sketch a rough storyboard with 6-10 beats to map out pacing and visual transitions. Finally, assemble a lightweight production calendar that keeps you on track without overcommitting and build a minimal asset list to guide your early work.
Pre-production Essentials
Before a single frame is drawn, pre-production sets the foundation. Establish a style guide with color palettes, line weight, and character proportions to keep visuals consistent. Build a lightweight asset library—character sheets, background concepts, prop designs—so you’re not reinventing wheels on every scene. Create a simple sound plan: identify mood cues, tempo, and any required foley. Based on AniFanGuide analysis, a clear pre-production plan reduces rework and speeds up revisions by aligning team expectations early. Gather references from your target genres, movies, or anime slices that match your vision. Finally, lock a basic production pipeline: which software will handle drawing, which will handle animation, and how you’ll integrate audio and effects. A minimal viable workflow will be easier to scale if you plan for iterations and feedback rounds.
Script, Storyboard, and Sound Design
Draft the script, including dialogue, timing, and sound cues; create a storyboard with rough sketches; plan sound design and music palette. Keep scenes tight and focused on emotional beats, ensuring each panel advances the story. Align lip-sync goals with your dialogue timing so character mouth shapes feel natural. This stage benefits from quick iterative tests: record scratch audio, test a few storyboard panels in motion, and adjust pacing before full production begins.
Animation Techniques and Workflows
Choose your primary animation approach: traditional 2D frame-by-frame, vector-based rigging, or a hybrid that blends drawn art with lightweight 3D elements. Understand the trade-offs of each method—hand-drawn frames offer richer expression while rig-based systems speed up production. Organize your timeline with clear layers for backgrounds, characters, props, and effects. Practice onion-skinning to keep consistent motion between frames, and establish a set of reusable animation blocks for recurring actions. This section emphasizes consistency, which is key for a convincing anime look and a scalable workflow.
Audio, Voice Acting, and Lip Sync
Sound defines mood and helps perception of motion. Plan voice direction early and recruit actors if you can, or use high-quality voice samples with permission. Record clean dialogue, add ambient sound and SFX, and design a music bed that supports the emotional arc without overpowering narration. Lip-sync should feel natural to the language and style; test small scenes to ensure timing remains convincing as characters move between expressions.
Rendering, Compositing, and Color Grading
Render passes should separate components (backgrounds, characters, effects) to simplify compositing. Use compositor software to blend layers, add lighting, depth, and motion blur carefully. Color grading establishes the final mood and ensures consistency across scenes, especially if you blend assets from different sources. Export multiple formats for delivery platforms and create a master file with your preferred settings. This stage wraps your workflow in a cohesive, polished product ready for sharing.
Distribution, Feedback, and Iteration
Publish to your chosen platforms and solicit feedback from viewers, peers, and mentors. Track what resonates and where viewers lose interest, then refine your pipeline for future projects. Iteration is essential in learning how to make anime videos; each release informs improvements in design, timing, and storytelling. Maintain a small backlog of enhancements for next episodes and keep updating your style guide as your skills evolve.
Tools & Materials
- Powerful computer suitable for video editing and rendering(A stable workstation with a capable GPU and ample storage (no brand commitments))
- Drawing tablet or stylus-based input device(Comfortable tablet, pressure sensitivity is helpful for line work and shading)
- Animation software suite(Primary tool for drawing/rigging/animation; examples include Krita, Blender, or Clip Studio Paint (choose a primary and a secondary for post-production))
- Audio recording setup(Microphone, basic pop filter, and a simple interface or computer mic setup)
- Video editing and compositing software(Software to assemble scenes, add effects, and finalize the edit)
- Asset library access(Stock or community assets and sound libraries with proper licensing)
- External storage and backups(Keep two backups of your project and assets to prevent loss)
Steps
Estimated time: Variable depending on project scope; plan for a multi-day workflow from planning to final render
- 1
Define concept and scope
Decide your video’s length, genre, and core premise. Create a logline and outline major beats. This keeps scope realistic and guides every subsequent choice.
Tip: Lock the core premise early to prevent scope creep. - 2
Write script and storyboard
Draft dialogue and action, then translate it into a storyboard with rough timing cues. Align scenes with beats and emotional arcs.
Tip: Keep dialogue concise; use storyboard thumbnails to test pacing. - 3
Design characters and environments
Create consistent character sheets and background concepts. Establish visual language and color cues that carry across shots.
Tip: Build a small set of reusable assets to speed production. - 4
Create rough animation and timing
Block key poses and major timing moments. Start with a storyboard-driven rough animation to validate motion.
Tip: Use simple rigs or hand-drawn frames to establish flow. - 5
Refine timing and add in-betweens
Smooth motion by adding in-betweens and adjusting timing for naturalistic movement. Test looped actions.
Tip: Check for arc consistency in motion between scenes. - 6
Audio capture and lip-sync
Record dialogue and design sound effects. Align lip-sync with mouth shapes and syllable timing.
Tip: Record scratch tracks first to validate timing before final audio. - 7
Render, composite, and color grade
Export passes, composite layers, adjust color and lighting, and render final output for distribution.
Tip: Render at a quality that preserves detail without creating huge files. - 8
Publish and gather feedback
Share your video, monitor audience response, and collect notes for iteration in future projects.
Tip: Document viewer feedback and map it to concrete improvements.
Frequently Asked Questions
How long does it typically take to complete an anime video project?
Project duration varies with length, complexity, and team size. A short solo piece can take days to weeks, while longer projects may span months. Build in milestones to monitor progress and adjust scope as needed.
It varies, but having milestones helps you stay on track.
What software should I start with if I’m new to anime production?
Begin with user-friendly tools for drawing and animation, then add a dedicated editor for post-production. Krita and Blender are popular free options, with Clip Studio Paint offering strong drawing features. Choose one primary tool and a secondary for editing.
Start with a capable drawing/animation tool and a separate editor for the final cut.
Do I need to draw every frame from scratch?
Not necessarily. Many projects use a mix of frame-by-frame animation for key frames and rig-based or reused assets for in-between frames. This saves time while preserving the desired style.
No—use a blend of frame-by-frame for key moments and rigs or reused assets for efficiency.
Can I reuse assets from other projects?
Yes, with proper licensing and attribution where required. Reusing character sheets, backgrounds, and props can speed up production, but ensure consistency with your current project’s style.
Yes, as long as you have the rights to reuse the assets and keep consistency.
What’s the best way to learn lip-sync effectively?
Study timing with the syllabic structure of the language, record reference dialogue, and practice with short test scenes. Visualize mouth shapes and adjust timing to match audio cues for believable characters.
Practice with short samples and test scenes to fine-tune timing.
Main Points
- Plan before you animate
- Choose a repeatable workflow
- Prioritize audio early
- Test with small scene blocks
- Iterate using viewer feedback