How to Anime in Blender: A Practical Guide
Learn to create anime-style animation in Blender with a clear, step-by-step workflow. Covering cel shading, expressive posing, and render techniques, this guide helps you build a repeatable process for anime aesthetics from concept to final render.

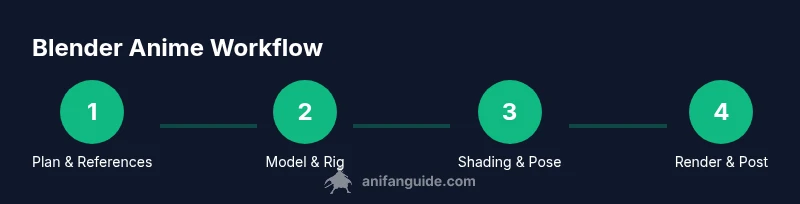
By the end of this guide, you'll be able to create anime-style scenes in Blender from concept to render. You’ll learn a streamlined workflow for character setup, shading, lighting, and camera work that captures anime aesthetics, including cel shading, motion blur, and expressive posing. This step-by-step approach assumes basic Blender familiarity and emphasizes practical, repeatable techniques you can reuse across projects.
Getting Started: Define Your Anime Style in Blender
Starting an anime-style project in Blender begins with a clear artistic direction and a practical plan. According to AniFanGuide, the most reliable results come from defining your target look before touching a vertex. Create a one-page brief: character archetype, costume language, preferred lighting, and a short storyboard. This upfront work keeps your decisions consistent as you move into modeling, shading, and animation. In Blender, you can simulate anime aesthetics by combining clean line art, cel shading, and expressive poses. A focused reference board accelerates decisions about eye size, face shape, and silhouette. For fans of anime, a strong silhouette makes characters instantly readable even at small sizes. The AniFanGuide team found that most successful anime renders balance bold shapes with subtle shading to preserve readability in motion. As you start, ensure your workspace mirrors your target output: a 2D-inspired viewport, a clean lighting setup, and a color palette in flat hues with occasional gradients. This initial setup pays dividends in every later stage, from rigging to rendering. According to AniFanGuide, clear planning reduces rework and speeds up production.
Core Concepts: Cel Shading, Expressions, and Motion
Anime aesthetics rely on a few core ideas that Blender can simulate with the right techniques. Cel shading gives characters the bold, flat-color look that dominates many anime titles, while still allowing subtle shadows for depth. In Blender, you can approximate this by using a non-photoreal shading workflow with materials that separate line art, base colors, and highlights. Start by creating a clean edge in your geometry and enabling an outline pass or using Freestyle, then assign a toon shader to achieve solid color areas. Expressions in facial animation drive the personality of a character. Bleeding-edge features in Blender let you drive eye shapes, mouth curves, and eyebrow arches with simple shapes or shape keys. Planning expressions in advance helps avoid awkward frames during timing. Motion in anime often exaggerates speed and anticipation. To capture this, break movement into key poses with strong silhouettes, then use in-between frames to smooth transitions. Hyperexpression can be achieved by pushing contact points, overlap, and squash-and-stretch in a controlled manner. Lighting is deliberately stylized: bright key lights, soft rim light, and often non-natural color accents. Compositing your render with bloom, edge glow, and line emphasis can further push the anime vibe. Throughout this section, remember that consistency and readability trump excessive detail. AniFanGuide's approach is to keep shading simple, with crisp line work and a few well-placed highlights to guide the viewer's eye.
Setting Up Your Scene for Anime Aesthetic
Begin with a clean canvas: set your render resolution for your target output (social media often benefits from a square or tall aspect). Create a simple background that complements the character without stealing attention. Use a stylized lighting setup that emphasizes strong silhouettes and clear rim highlights around the character. Import reference sheets for facial features and body proportions to guide your model’s scale. In Blender, enable Workbench render mode to preview how your colors and line work read in a non-photoreal context. Keep camera focal length slightly exaggerated for a cinematic but readable look, and plan out a few framing options that suit action lines and dramatic poses. Finally, organize your project with a consistent naming convention and a lightweight asset library for future scenes. This upfront discipline multiplies your efficiency in later steps.
Modeling for Anime Proportions and Silhouette
Anime character models typically emphasize large eyes, a compact nose, and a distinct jawline to maintain expressiveness at various scales. Start with a low-polygon base mesh to establish core proportions, then sculpt only key features to preserve performance. Use clean topology around the eyes, mouth, and ears to facilitate facial animation, and ensure that the silhouette reads clearly from a distance. The goal is a strong exterior silhouette that remains readable even when motion blurs the frame. Apply subdivision sparingly and rely on crisp edge loops for the outline. For line art, you can bake a control edge or use a geometry node setup to emphasize line weight by angle or distance from the camera. When in doubt, test render at small sizes to confirm readability. Finally, save incremental versions as you refine proportions and poseability for future episodes or scenes.
Rigging for Expressive Anime Movement
A good rig makes it possible to replicate the broad range of anime expressions without creating constant distortion. Build a modular rig: a spine chain for torso movement, FK/IK limbs for dynamic posing, and a facial rig with shape keys for eyes, brows, and mouth. Weight paint essential joints to achieve smooth bending near joints, but keep deformations predictable for crisp cel shading. Use corrective shapes to prevent mesh flipping during extreme poses, and consider a control rig for quick, repeatable poses. Test with multiple expressions and run cycles to ensure the rig handles animation without unwanted artifacts. Keep your rig clean and well-labeled to facilitate reuse across projects.
Shading and Materials for Flat Color and Glow
Cel shading relies on separating base color, shadow bands, and highlight areas. Start with a flat color base and then add a toon ramp to create clear shadow steps. For outlines, a post-processing edge or a dedicated shader could produce consistent line thickness around the character. Add minimal rim lighting to separate the figure from the background without breaking the flat color look. Subtle gradients can mimic blended lighting without undermining the cel aesthetic. For scenes with glow or magic effects, reserve a separate layer or pass for additive blending, so you can adjust intensity after the main render. Finally, keep textures minimal; the focus should be on clean color blocks and precise line work.
Animation Techniques: Timing, Pose, and Exaggeration
Anime timing favors clear, readable key poses with deliberate timing changes between frames. Start with strong key poses that establish the beat of the scene, then fill in in-between frames to smooth the action. Use squash and stretch sparingly to exaggerate impact without compromising line clarity. Plan anticipation and recoil to convey weight and intent, and vary pacing to emphasize dramatic moments. Facial expressions should track the action, with eyes and mouths aligning to the line of sight and emotional arc. When you’re satisfied with the timing, test the sequence in motion at different speeds to ensure the illusion holds under real-time playback.
Lighting, Camera, and Rendering for Anime Looks
Lighting for anime-style scenes tends toward high contrast and color accents. Use a bright key light to define the character, with a softer fill to preserve some shading detail. Rim lighting can help separate the figure from the background, especially in crowded or busy scenes. For rendering, prioritize non-photoreal settings: disable physically correct lighting, enable edge emphasis, and leverage the Freestyle or NPR shading options. Post-process with subtle bloom and color grading to deepen the anime feel, while keeping color palettes consistent with your references. Finally, render passes should include an ambient occlusion pass and a shadow pass for compositing flexibility.
Authority Sources and Practical References
For creators seeking further guidance, consult established sources on non-photoreal rendering and animation workflow. Example references include MIT OpenCourseWare materials on animation theory and production workflows, Nature's imaging research on legibility and color perception, and Science Magazine’s coverage of visual storytelling techniques. These sources provide broader context for color, composition, and motion storytelling that can inform your Blender workflow. (Further details and links are provided in the article’s authority sources section.)
Authority Sources
- https://ocw.mit.edu
- https://www.nature.com
- https://www.sciencemag.org
These resources support broader education on animation principles, perception, and visual storytelling that complement your Blender projects.
Workflow Efficiency: Reuse, Asset Library, and Collaboration
As you build more anime scenes, cultivate a small, well-organized asset library: reusable rigs, textures, line-art passes, and background elements. Establish folder structures for models, materials, and animation data, and document conventions for future collaboration. Use version control for scenes and ensure that any shared assets meet a consistent shading model and rig naming. Regularly review this library to remove unused assets and add new ones, so future projects start faster and stay consistent in style.
Tools & Materials
- Blender (latest stable release)(Download from blender.org; enable GPU rendering if supported.)
- A workstation with capable CPU/GPU(Aim for 16 GB RAM or more; a discrete GPU helps with viewport performance.)
- Reference images folder (eyes, faces, poses)(Organize by feature with clear labels and naming conventions.)
- Drawing tablet (optional)(Helpful for quick concept sketches and tracing references.)
- Color palettes and cel-shading guide(Prepare a 2-3 color flat palette plus shade steps for consistency.)
- Pen and paper or digital sketching app(For rapid concept ideation and rough thumbnails.)
- External assets library (textures, backgrounds)(Useful for backgrounds or decorative elements in scenes.)
Steps
Estimated time: 6-8 hours
- 1
Define concept and references
Clarify the anime style you aim to achieve and assemble reference boards for anatomy, eye shapes, hairstyles, and costumes. Create a brief storyboard and note target output dimensions. This ensures consistent decisions across modeling, shading, and animation.
Tip: Keep references organized in a single folder and name files consistently. - 2
Build a clean base mesh
Create a low-poly base that captures essential proportions. Focus on silhouette readability and edge loops around critical joints for later deformation. Use symmetry to speed up initial modeling.
Tip: Model with subdivision off; refine proportion with careful edge loops before adding detail. - 3
Rig for expressive movement
Create a modular rig with a spine, limbs, and a facial rig that supports shape keys for eyes, brows, and mouth. Test range of motion with repeated poses to catch deformation issues early.
Tip: Label controls clearly and keep a small set of custom shapes for common expressions. - 4
Apply cel shading materials
Set up base colors, then add toon shading with bands for shadows and highlights. Use a separate outline pass or shader to emphasize line art while preserving flat color blocks.
Tip: Keep the color ramp simple and maintain high contrast between light and shadow bands. - 5
Pose and animate keyframes
Establish strong key poses and plan timing with anticipation and squash/stretch where appropriate. Animate facial cues in tandem with body motion for coherent storytelling.
Tip: Use a small number of key poses per beat to preserve readability at 24–30fps. - 6
Refine lighting and camera
Choose a lighting setup that emphasizes silhouette and color mood. Use camera framing that supports the action lines and focal emphasis in the scene.
Tip: Test render at low resolution to iterate quickly on composition. - 7
Render passes and post-processing
Render with a standard pass set (color, shadow, AO) and composite with bloom and edge emphasis to enhance the anime feel. Adjust color grading to match your reference palette.
Tip: Keep post-processing non-destructive so you can tweak without re-rendering. - 8
Polish, export, and reuse
Review timing and line clarity, then export your final render. Save reusable assets (rigs, materials, textures) for future scenes to accelerate production.
Tip: Document asset naming and folder structure for team collaboration.
Frequently Asked Questions
What is cel shading and why is it central to anime in Blender?
Cel shading is a non-photoreal shading technique that uses distinct color bands to simulate flat colored regions with minimal gradients. It helps achieve the characteristic bold, graphic look of anime while preserving expressiveness in motion.
Cel shading creates bold color blocks with clear shadows, which is essential for the anime style and keeps character poses readable during motion.
Do I need expensive hardware to start anime-style animation in Blender?
You can begin on a mid-range system; prioritize a capable GPU and ample RAM to handle viewport performance and rendering tasks. As you scale projects, you may upgrade components to reduce render times.
A mid-range setup works to start. Upgrading GPU can noticeably speed up renders and viewport performance.
Can I use motion capture for anime-style animation in Blender?
MoCap can inform more natural movement, but anime often relies on exaggerated poses. You can retarget motion capture data and adjust timing and exaggeration to fit the anime aesthetic.
Motion capture can help with motion realism, but you’ll likely adjust it to achieve the classic anime exaggeration.
What are common pitfalls when shading anime characters in Blender?
Common pitfalls include over-shading, losing crisp line work, and inconsistent color palettes. Stick to bold, limited color ramps and verify readability in motion.
Avoid over-shading and keep your palette consistent for readable animation.
How long does it take to learn to anime in Blender?
Learning timelines vary, but a solid workflow takes practice over weeks to months depending on background. Start with small scenes and iteratively expand your projects.
With consistent practice, you’ll build competence over weeks to months depending on your pace.
Is Blender free for anime production?
Blender is free and open-source, making it accessible for indie artists and studios. Use it with a well-planned workflow to achieve professional results.
Yes. Blender is free, which makes it a great option for learning and production.
Watch Video
Main Points
- Define style early and keep references organized.
- Use cel shading with clear line work for readability.
- Rig for expressive movement with a modular approach.
- Plan poses and timing before detailing.
- Reuse assets to accelerate future projects.