How to Design an Anime Character: A Step-by-Step Guide
Learn to design an original anime character from concept to final render with practical tips, anatomy basics, hair, color theory, and presentation sheets.

By the end, you’ll be able to design a full anime character from concept to final render. This guide covers defining personality, proportions, facial features, hair, wardrobe, color, and presentation sheets, plus practical tips for iteration and presentation. You’ll find step-by-step actions, recommended tools, and visual references to help you practice between sessions.
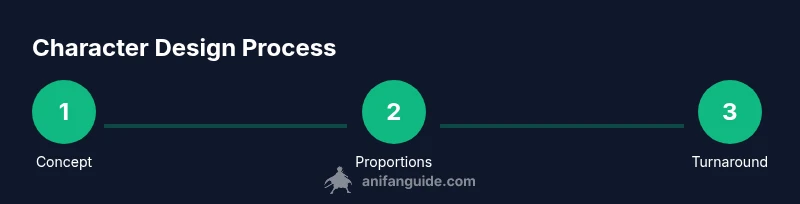
Concept and Personality
According to AniFanGuide, a character's personality is the compass for every design choice. Start by defining who your character is, where they come from, and how they fit into your story. Create a concise bio and a short list of core traits (brave, clever, shy, impulsive, etc.). Translate those traits into visual cues: posture, color cues, and recurring motifs. Sketch quick silhouettes that reflect personality, then test which silhouettes feel most true to the backstory. Use mood boards with color chips, fashion cues, and cultural references to lock in a vibe you can carry through expressions and poses. When personality guides form, you reduce backtracking during refinement and keep your character readable in quick thumbnails. This alignment also makes multi-angle turns and action shots feel cohesive from the start.
Proportions and Anatomy Refresher
Anime design often uses stylized anatomy. A common approach is to establish base proportions with a head-to-body ratio that suits the target look, then exaggerate where needed. For younger looks, heads may be larger relative to the body; for more mature designs, torso length and leg proportion can be longer. Start with a simple skeleton: head, neck, spine, shoulders, hips, arms, and legs, then refine into a sleek silhouette. Practice multiple iterations with variations in height, limb length, and chest width to see how each change communicates personality. Proportions influence readability in small thumbnails, so test at reduced scale and compare against your reference set. Keep lines clean and avoid over-detailing early; prioritize gesture and readability. This foundation ensures consistent anatomy across turns and expressive lighting in scenes.
Head and Face Structure
The head is the anchor for a character's appearance. Start with a rounded skull shape, mark the jawline, and define cheek hollows to shape the face. Use a light construction grid to place eyes, nose, and mouth in harmonious alignment. In anime, facial features are often stylized: larger eyes for innocence or sharp, narrow eyes for intensity. Build a neutral expression first, then test happy, surprised, angry, and sad variants to study how lines, brows, and mouth shapes alter mood. Keep a few reliable proportions handy (eye width, distance between features) so you can reproduce the look consistently across angles.
Eyes, Nose, Mouth Detailing
Eyes are the primary storytelling tool in anime design. Decide on eye shape, size, and lid treatment that match personality. Experiment with iris color, highlights, and pupil shape to convey mood. The nose and mouth should complement the eye emphasis; many styles use small or simplified noses and mouths to maintain a clean silhouette. Practice symmetrical features but allow tiny asymmetries for character personality. Add subtle shading to indicate light direction and depth, but avoid over-detailing at early stages. A consistent feature map helps maintain likeness across expressions and poses.
Hair Design and Color Theory
Hair defines silhouette and movement. Sketch hair shapes that frame the face and read cleanly from a distance. Plan how hair flows with head turns and body movement, including how bangs or fringe interact with eye line and brow. Color theory matters: pick a dominant hue and one or two accent shades for highlights and shadows. Use warm and cool tones to create depth and vibrancy, and consider color symbolism aligned with the character’s traits. Practice several hair silhouettes—long, short, layered, and tied—to see what reads best for the character’s personality and role.
Body Language and Posture
Silhouette matters more than細 details at first glance. Create dynamic poses that reflect confidence, shyness, or aggression while keeping the design readable. Pay attention to weight distribution, line of action, and how limbs frame the torso. Thumbs, fingers, and foot placement contribute to the character’s personality and era. Use a handful of stock poses to validate expressiveness and ensure consistency across scenes. Positive and negative space around the character can enhance readability in action scenes and group shots.
Costume Design and Silhouette
Outfits should support personality and story while remaining recognizable. Start with a simple silhouette and add distinctive elements (military collar, cape, belt, insignia) to convey role and backstory. Consider practical constraints for animation: avoid overly thin or highly detailed fabrics that don’t read well on small screens. Create color and material contrasts to separate layers and emphasize movement. A strong costume silhouette makes the character instantly identifiable, even in silhouettes or quick family compositions.
Color Palette and Rendering Light
Build a cohesive color palette with a dominant hue and two accent colors. Test the palette against a neutral background and under various lighting conditions to ensure readability. Learn basic shading principles: how light direction affects form, where shadows fall, and how ambient light bleeds into color. Use color to communicate mood: cooler palettes for calm or distant tones; warmer palettes for energetic characters. Keep a color key on hand for consistent shading across different expressions and outfits.
Turnaround Sheets and Presentation
Turnaround sheets (front, side, three-quarter, back) demonstrate how the character looks from multiple angles. Include expression charts and a few dynamic poses to showcase range. Present clean line work, consistent proportions, and color flats, shading, and highlights in the same file if possible. A well-organized sheet aids collaboration with writers, directors, or 3D modelers and ensures your character translates into animation or games. Practice presenting a concise character bible that captures personality, backstory, and key visual cues.
Authority Sources
To deepen your understanding of design fundamentals, consult credible sources on anatomy, perspective, and color theory. The following references provide foundational guidance you can adapt to anime style: • https://www.nih.gov • https://www.britannica.com • https://www.stanford.edu
Tools & Materials
- Graphics tablet with pressure-sensitive stylus(Wacom or equivalent preferred; enables smooth line work and shading on digital canvas)
- Pencils (HB and 2B)(For sketching and early concept studies on paper)
- Eraser and blending tools(Kneaded eraser or vinyl eraser; helps clean lines and soften shadows)
- Ink pen or digital inking brush(For clean line art and final line weight)
- Drawing paper or digital canvas(Prefer wide, smooth surface for clean lines)
- Color palette tools (color wheel or digital swatches)(Define dominant hue and accents before coloring)
- Reference images folder(Collect eyes, hairstyles, and clothing references)
- Lighting references(Helpful for shading realism and depth)
- Software with layers (e.g., painting program)(Support for layers, brushes, and non-destructive editing)
- Ruler or guidelines (optional)(Useful for quick symmetry checks)
Steps
Estimated time: 2-4 hours
- 1
Clarify concept and context
Define who the character is, their role in the story, and the target audience. Write a short bio and list core traits to guide design choices.
Tip: Create a one-page character brief you can refer to during every sketch. - 2
Sketch rough anatomy and proportions
Draft a simple skeleton and proportion framework. Explore multiple head-to-body ratios to find the right stylization for your character.
Tip: Start with light lines; don’t commit to final shapes until proportions feel balanced. - 3
Define head shape and facial framework
Block the skull shape and jawline, then place eye and mouth guides. Establish a neutral baseline to compare expressions.
Tip: Use a light grid to keep features aligned across angles. - 4
Refine facial features (eyes, nose, mouth)
Choose eye shape and eyelid style that matches personality. Add a simple nose and mouth that complement the eyes and preserve the silhouette.
Tip: Test several expressions quickly to see how features read at a glance. - 5
Design hair and color ideas
Sketch multiple hair silhouettes and plan color shading. Ensure hair flow respects movement and frames the face.
Tip: Draft hair separate from the head to test volume and shape reading. - 6
Create initial outfit and silhouette
Add a distinctive garment that reflects role and personality while keeping a strong, recognizable silhouette.
Tip: Limit details in early versions to preserve readability at small scales. - 7
Choose color palette and lighting plan
Select a dominant hue and two accents; map lighting direction to emphasize form and texture.
Tip: Document your color key for consistent shading across renders. - 8
Build turnaround and pose set
Create front, side, and three-quarter views plus a few expressive poses to test consistency.
Tip: Ensure proportions stay stable across angles by checking against the baseline grid. - 9
Refine lines, shading, and textures
Tighten line weight, add soft shadows, and layer texture to imply fabric or hair quality.
Tip: Work non-destructively with layers to easily revise shading. - 10
Present, gather feedback, and iterate
Share the character sheet with peers and writers; note suggestions and implement improvements.
Tip: Keep a brief revision log to track evolved decisions.
Frequently Asked Questions
What is the first step in designing an anime character?
Begin with a concept and context. Define the character’s role, backstory, and personality to guide all subsequent design decisions.
Start with the concept and context, then translate that into the design.
Should I learn realistic anatomy first or dive into stylized anime proportions?
Learn a basic anatomy foundation, then adapt proportions to your chosen anime style. Start simple and gradually exaggerate features for character voice.
Learn the basics first, then stylize to fit your anime look.
What software should I use for digital anime character design?
Any layer-enabled drawing program works. Choose one you enjoy and master brushes, layers, and symmetry tools to streamline workflow.
Pick a program you like and learn its layers and brushes.
How long does it take to master anime character design?
Mastery varies with practice. Regular, focused sessions over weeks and months yield the best improvements in proportion, posing, and color.
It varies, but steady practice leads to steady progress.
Can this guide apply to characters for indie games or animation?
Yes. The principles transfer to games and animation; adapt proportions and outfits to technical constraints while maintaining clear silhouettes.
Absolutely—adapt the design for your medium.
Is there a recommended order for practicing line art and coloring?
Start with clean line art, then apply base colors, followed by shading and highlights. Layer order helps manage revisions efficiently.
Line art first, then color, then shading.
Watch Video
Main Points
- Define a clear concept before drawing
- Master basic proportions and reference sheets
- Craft a distinct silhouette for instant recognition
- Prepare a turning sheet for multi-angle presentation
- Iterate with feedback to refine your design