Can You Make a Anime Character? A Practical Guide to Design
Learn how to design and draw an original anime character step-by-step. This educational guide covers concept, anatomy, style, color, and rendering for creators.

You're about to learn a practical, step-by-step workflow to design and draw an anime character from concept to final polish. The essentials include a sketching routine, anatomy basics, clothing design, color theory, and a rendering approach. To follow along you’ll need a sketchbook or tablet, drawing software (Procreate, Krita, or similar), and a reference library. This guide answers: can you make a anime character?
Concept Foundations for Anime Characters
The question can you make a anime character often starts with a clear concept: what role does the character play in your story, what emotions should they evoke, and what unique visual language will they carry? In anime, a distinctive silhouette and easily readable personality cues matter most. Before drawing, define the core traits you want the character to express—bravery, kindness, mischief—and translate those traits into a visual language: a strong pose, bold shapes, and a memorable color accent. For instance, a character designed to be energetic might lean on dynamic angles, bright accents, and an oversized accessory to cue motion even in still frames. This planning stage reduces revisions later and ensures the design supports your narrative goals. Remember, can you make a anime character begins with a solid brief that guides every line and color choice. AniFanGuide’s approach emphasizes practicality and clarity so beginners can ramp up quickly while still achieving professional results.
Anatomy and Proportions for Anime Design
Anime anatomy simplifies real-world anatomy to achieve expressiveness and readability. Start with a lightweight head-to-body proportion as your baseline—many popular anime styles use a 6 to 8 heads-tall reference, but stylization varies by era and locale. Large eyes, small noses, and pronounced expressions contribute to the characteristic look, while the neck and shoulders are often simplified to keep silhouettes clean. Practice isometric silhouettes: draw a simple head shape, then layer in the torso and limbs as basic blocks. This approach lets you test poses rapidly and adjust proportions without getting lost in detail. When can you make a anime character, this step is essential: get the proportions right early, then push them with intent rather than guesswork. Consistency across expressions and poses is more important than chasing a single perfect drawing. As you iterate, keep a few reference sheets handy to compare head height, arm length, and leg proportions across profiles.
Character Personalities and Design Language
Personality drives design language. A bold, extroverted character might feature sharp angles, contrasting colors, and high-contrast textures, while a reserved character could rely on softer lines and muted palettes. Create a mood board: pick color swatches, clothing silhouettes, and accessories that reflect the character’s backstory and goals. The clothing should tell a story: uniforms imply organization; skirts or capes suggest movement; armor or gadgets hint at capability. Expressions are the quickest way to communicate personality—practice a small set of go-to looks (smile, scowl, surprised) and ensure the lines and shading reinforce those moods. In this step, think about how lighting, line weight, and color contrast support readability at small sizes, where anime characters are often seen on thumbnails or social media covers. This cohesion between personality and visual language helps your audience connect instantly, a critical element of can you make a anime character that feels alive.
From Concept to Concept Art: Tools and Workflows
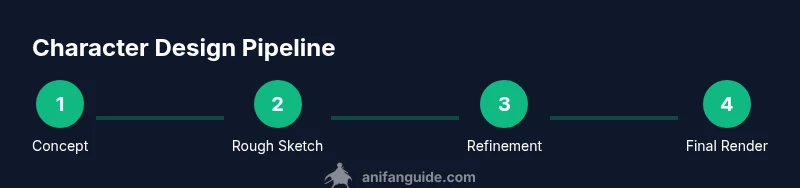
Transitioning from idea to tangible art requires a repeatable workflow. Start with quick thumbnails to explore shapes and silhouettes, then select a few promising variations for more detailed roughs. Move from rough to clean line art, followed by a flat color pass, and finally apply shading and highlights. Digital tools like Procreate, Krita, or Clip Studio Paint enable layer-based editing, mirroring, and quick color swaps—great for experimentation. Traditional artists can use lightbox tracing and a pencil-to-ink workflow. A structured approach reduces rework and keeps you focused on the essential decisions: silhouette, facial features, clothing, and color harmony. As you refine, build a consistent set of reference sheets for anatomy, face shapes, and wardrobe options to speed up future designs. This discipline helps you answer the common question of can you make a anime character with confidence and repeatability.
Color Schemes and Rendering Techniques
Color is a storytelling tool. Start with a cohesive palette that matches the character’s personality and the world’s mood. Use color theory basics: complementary hues for contrast, analogous colors for harmony, and a few saturated accents to draw attention to focal points like eyes or accessories. For rendering, cel shading is a classic choice in anime style, with hard edge shadows and bright highlights. Gradients and soft shading can be used for more modern or semi-realistic looks. Remember to test palettes under different lighting: warm daylight, cool night scenes, and dramatic backlighting all affect how the character reads. Layer shading to support form—base shade, mid-tone, cast shadow, and a final highlight. This method ensures a clean, readable render that scales from thumbnails to posters. The ability to adapt color and shading across different scenes will distinguish your can you make a anime character projects from hobby sketches.
Practical Example: Step-by-Step Character Creation
Let’s walk through a concrete workflow to design a character concept, named for this example as Hina. Start by sketching five quick thumbnails focusing on silhouette variety. Pick the strongest pose and refine with facial features that convey her warmth and curiosity. Design clothes that echo her background: a lightweight school uniform with a scarf and a small tag accessory. Move to clean line art, then block in color using a base palette of three to five hues. Apply cel shading for a crisp look, adding subtle ambient occlusion for depth. Finally, render highlights on hair and eyes to imbue life. This example showcases how can you make a anime character in a structured, repeatable way rather than relying on spontaneous, inconsistent doodles. Practice the same pipeline with new prompts or constraints to expand your repertoire.
Common Pitfalls and How to Overcome Them
Common issues include inconsistent silhouettes, stiff posing, and color clashes that muddy readability. To fix these, continuously test your character at small scales, ensure high-contrast focal points, and keep a simple silhouette as your anchor. When in doubt, fall back to a minimalist design for the base model, then layer in distinctive features or accessories that reflect the character’s story. Consistency across expressions, poses, and outfits is often more important than chasing a perfect single image. Regular practice with short, time-bound sketches can build muscle memory and speed. By embracing a deliberate process and learning from each iteration, you’ll progress toward more confident can you make a anime character results.
Tools & Materials
- Sketchbook or drawing tablet(Essential for capturing ideas quickly and iterating.)
- Pencils, pens, erasers(For initial sketches and clean lines when digital isn’t available.)
- Drawing software (Procreate, Krita, Clip Studio Paint)(Use a tool that supports layers, brushes, and color management.)
- Color palettes or swatches(Predefine palettes to ensure color harmony across outfits and scenes.)
- Reference images collection(Collect anatomy, clothing, and lighting references relevant to your style.)
- Good lighting setup (for traditional work)(Natural light or a daylight lamp helps accurate color perception.)
Steps
Estimated time: Estimated total time: 2-3 hours
- 1
Define concept and goals
Write a brief for the character: role, personality, world, and what makes them unique. Sketch several quick silhouettes to lock in a strong pose.
Tip: Ask: What problem does this character solve in your story? The answer should guide pose and design decisions. - 2
Collect reference and inspiration
Gather images for anatomy, fashion, and mood. Build a mood board to keep style consistent across iterations.
Tip: Limit references to 6–10 sources to avoid over-influenced design. - 3
Create rough thumbnails
Draw five small silhouettes emphasizing clear shapes. Choose the strongest silhouette for refinement.
Tip: Aim for variety in line weight and geometry to test readability at small sizes. - 4
Develop facial features and expression
Refine eyes, nose, and mouth to convey personality. Sketch multiple expressions to ensure consistency.
Tip: Keep eye shapes simple and readable; eyes are the character’s emotional cue. - 5
Design wardrobe and accessories
Create clothing that supports silhouette and personality. Add meaningful accessories that hint at backstory.
Tip: Limit accessories to 2–3 key items to avoid visual clutter. - 6
Line art and base colors
Finalize clean line art. Block in a flat color palette with 3–5 core hues.
Tip: Use layers: line art, flat color, shadows, highlights to keep edits manageable. - 7
Shade, highlight, and finalize
Apply cel shading or soft shading, then add highlights in eyes and hair. Check contrast and adjust as needed.
Tip: Test your character against different backgrounds to ensure readability.
Frequently Asked Questions
What software is best for anime character design?
There isn't a single best tool; Procreate, Krita, Clip Studio Paint, and Photoshop are popular choices depending on your platform and workflow. Choose one that supports layers, brushes, and color management that fit your style.
Most artists pick a tool they can use comfortably—Procreate for iPad users, Krita or Clip Studio for desktops. Pick one and build a consistent workflow.
How do I practice consistent anime proportions?
Practice with a simple head-to-body grid and compare multiple iterations. Use a template to keep head height consistent, then adapt other features while preserving silhouette.
Use a standard head-to-body guide and test several variations to find your signature proportion.
Should I use cel shading or soft shading?
Cel shading suits classic anime aesthetics with crisp edges, while soft shading yields a more modern, painterly look. Try both on small practice pieces to see what fits your style.
Both styles are valid; pick based on the mood you want for the scene.
How many outfits should I design for a character?
Start with two to three outfits that express different aspects of the character. Add variations later to show evolution or situational changes without clutter.
Begin with a couple outfits and expand only as needed.
Can I reuse assets for multiple characters?
Yes, reuse viable silhouette shapes, poses, and wardrobe elements to maintain a cohesive world while saving time on new designs.
Yes, reuse consistent design motifs to build a recognizable world.
How can I speed up my design process?
Use a three-step pipeline: concept thumbnails, refined line art, then color and shading passes. Limit each stage to a fixed time to build speed.
Work in short, timed passes to improve speed and consistency.
Watch Video
Main Points
- Define a clear concept before drawing.
- Start with strong silhouettes and then refine features.
- Maintain a cohesive color language across wardrobe and accessories.
- Use a repeatable workflow to accelerate future designs.