How to Animate for a Video: Step-by-Step Guide
Learn to plan, design, and deliver engaging video animations with practical steps, software choices, and best practices for beginners and experienced animators alike.

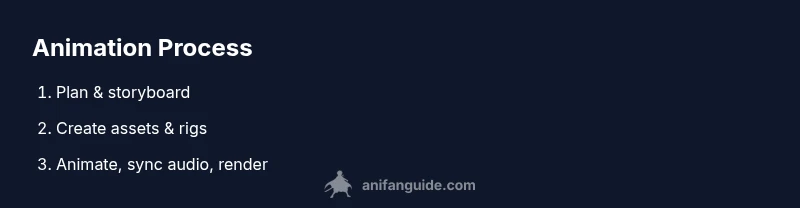
How to animate for a video: You’ll plan with a storyboard, pick suitable software, create key poses, and refine timing to deliver polished motion. The guide covers asset prep, animation workflows, audio syncing, and export tips. According to AniFanGuide, starting with a solid storyboard reduces revisions and speeds up production.
Why animation matters for video storytelling
Animation amplifies storytelling by translating ideas into dynamic visuals, guiding viewers through mood, pacing, and information with clarity. For video creators, animation can simplify complex concepts, add humor, and keep audiences engaged across platforms. According to AniFanGuide, a well-planned animation works best when it aligns with the narrative arc, sound design, and audience expectations. When you start with a strong premise and clear objectives, your motion will feel purposeful rather than decorative. Animation helps explain processes, illustrate invisible mechanisms, and convey pace that live-action may struggle to capture, making it easier to educate, entertain, and convert viewers into fans or customers.
Pre-production: storyboard, references, and shot planning
Before you touch a single frame, invest in planning. Create a storyboard or animatic to map scenes, camera movements, and timing. Gather reference footage or drawings to anchor anatomy, expressions, and motion. Set a clear deliverable: length, aspect ratio, and output format. AniFanGuide emphasizes that a tightly scoped storyboard reduces revisions and accelerates your workflow. Break complex ideas into simple beats: pose, hold, and follow-through. Build a shot list with one line per shot, including action, dialogue cues, and timing notes. Finally, define acceptance criteria: what constitutes a finished shot, what audio must align, and how the color and lighting should feel.
Tools and pipelines: choosing software and workflow
Your tool choice should fit your goals and budget, not your hype. For 2D animation, options range from beginner-friendly to professional-grade: Blender offers full 3D and 2D capabilities, while Toon Boom Harmony provides robust rigging; After Effects excels at motion graphics; Procreate is great for hand-drawn frames on iPad. For 3D, consider Blender or Maya when you need photoreal lighting and camera moves. Define a workflow: asset creation, rigging or frame-by-frame setup, animation, comp/FX, audio, render, and export. Decide on a pipeline that supports your team and project timeline. Create a version control plan and backup strategy to prevent loss of progress. This stage is where you decide whether to animate frame-by-frame, use rigs, or combine approaches to achieve the desired look.
Core animation principles you must apply
Even with powerful tools, your animation will feel alive only if you apply core principles: timing, spacing, and anticipation. Use timing to convey weight and impact; faster timing can imply urgency, slower timing conveys gravity. Spacing defines the arc of motion between poses; inconsistent spacing creates jank. Anticipation prepares the audience for an action, making movements feel natural. Follow-through and overlap produce realism by letting limbs and accessories continue moving after the main action ends. Solid easing curves help avoid robotic motion. Keep a consistent frame rate and ensure your keyframes reflect the intended emotion. Apply these ideas across rigs or drawn frames; the same principles scale from tiny facial micro-moments to large camera pans.
Techniques: keyframes, rigs, and motion capture
Begin with clear key poses by blocking out major actions first. Use a graph editor to refine timing and easing for natural motion. If you work with rigs, set up intuitive controllers that mimic real-world joints and leverage secondary motion for realism. Motion capture can speed workflows when used judiciously; clean up captured data to fit your art style. Blend methods as needed: hand-drawn frames for texture, plus a rig to maintain consistency in longer sequences. Regularly test playback to catch timing issues early, and maintain a library of reusable assets to accelerate future projects.
Sound, lip-sync, and timing alignment
Audio is the heartbeat of video animation. Plan lip-sync and mouth shapes around dialogue timing and musical cues. Use audio beats to anchor key poses and adjust frame timing so movements feel synchronized with sound events. Consider re-recording or adjusting voice timing if the animation feels off. Keep a separate audio track for effects and ambience to avoid mixing conflicts. By aligning motion to the rhythm of the soundtrack, you’ll create a more engaging and professional result.
Rendering, export, and distribution considerations
Choose a rendering profile that matches your target platform (web, social, or broadcast). Maintain a high enough resolution and frame rate to preserve clarity across devices, then compress only as needed to balance quality and file size. Use appropriate color management and ensure consistent lighting in your scenes. Export in a versatile format (e.g., MP4 with H.264) and provide alternate streams for accessibility, such as captions. Finally, review the exported file on multiple devices to catch platform-specific issues and adjust settings if necessary.
Common mistakes and fixes
Common mistakes include overcomplicating scenes with excessive motion or clutter, poor spacing between poses, and inconsistent timing. Lip-sync without accurate timing can break immersion. Always test early with a rough pass to catch issues before polishing. Keep your animation plan simple enough to execute well within your timeline, and iterate based on feedback from peers or your audience.
A practical example: from idea to final render
Start with a concise concept: a 30-second explainer about a concept. Create a storyboard that maps scenes, camera movement, and audio cues. Design or assemble assets, set up a simple rig or frame-by-frame workflow, and block major poses. Animate key moments, refine with in-between frames, and add secondary motion. Sync the audio, adjust pacing to match the soundtrack, and perform final color correction and lighting tweaks. Render in batches, review, and iterate until you’re satisfied with the final delivery.
Tools & Materials
- Capable computer (CPU+GPU)(Quad-core or better; 16GB RAM minimum; GPU acceleration supported by chosen software)
- Animation software(Examples: Blender, Toon Boom Harmony, After Effects; select based on 2D/3D needs)
- Drawing tablet or stylus(Pressure sensitivity helps with line quality and timing)
- Reference materials (images, videos, notes)(Study motion, anatomy, and acting choices for believable results)
- Audio library or sound effects(For syncing and mood enhancement)
- External storage / cloud backup(Regular backups prevent data loss)
- Headphones or studio monitor(Critical for accurate sound mixing and lip-sync checks)
- Color management tools or reference swatches(Maintain consistent lighting and color across scenes)
Steps
Estimated time: 4-6 hours
- 1
Plan and storyboard
Draft a concise concept and map scenes with a storyboard or animatic. Define scene length, camera moves, and key emotional beats. Establish acceptance criteria and a rough schedule to keep the project on track.
Tip: Start with a one-page storyboard and timestamp each frame to guide later work. - 2
Prepare assets and palettes
Gather or create character designs, backgrounds, and props. Build a color palette and a consistent style guide. Name and organize assets clearly for easy reuse during animation.
Tip: Organize assets in a shared folder and maintain versioned files. - 3
Create blocking/key poses
Block out the main poses to establish composition and timing. Ensure the silhouettes read clearly from a distance and align with the storyboard. Avoid tiny, unnecessary movements at this stage.
Tip: Focus on strong pose readability and rhythm between frames. - 4
Refine timing with in-betweens
Fill in the frames between key poses, adjusting spacing and easing to achieve natural motion. Use a graph editor to smooth timing and avoid robotic movement. Review frequently at playback speed.
Tip: Use easing curves to create anticipation and weight. - 5
Add motion details and secondary actions
Enhance realism with subtle secondary motion (hair, clothing, fingers). Ensure follow-through and overshoot feel believable. Keep the main action clear and uncluttered.
Tip: Add subtle follow-through to avoid stiffness in the main action. - 6
Animate audio sync and lip-sync
Plot key moments to match dialogue and sound cues. Adjust mouth shapes to align with phonemes and timing. Test with the target soundtrack to ensure coherence.
Tip: Plot key poses to audio peaks and adjust timing using the graph editor. - 7
Polish lighting, shading, and look
Apply consistent lighting to unify scenes, refine shadows, and ensure color consistency. Use quick color grading passes to achieve the intended mood. Validate the look across devices if the video will be viewed on multiple screens.
Tip: Test across devices to prevent color and brightness issues. - 8
Render, review, and iterate
Render test frames, review for errors, and adjust as needed. Create final renders in batches to manage time and quality. Gather feedback and iterate until the result satisfies your brief.
Tip: Render in stages and keep a changelog to track changes.
Frequently Asked Questions
What is the first step to begin animating for a video?
Begin with a storyboard or animatic to map scenes, timing, and camera moves. Establish the core beats and how information will flow.
Start with a storyboard to map scenes and timing, then move to blocking.
Which software should beginners learn for 2D animation?
Blender offers a free option with 2D/3D capabilities; For dedicated 2D work, Toon Boom Harmony or After Effects are common choices depending on needs.
Blender is great for beginners; for more 2D-focused work try After Effects or Toon Boom.
How long does it take to animate a short video?
Time depends on length and complexity; a simple 60-second piece may require several days for a beginner.
Depends on length and complexity; a simple piece can take several days.
Should I use frame-by-frame animation or rigs?
Choose based on style and timeline. Frame-by-frame offers a traditional feel, while rigs speed production and ensure consistency.
Choose based on style and timeline; rigs can speed up production, frame-by-frame offers texture.
How do I sync animation to audio?
Add audio cues, plot key moments to beats, and tweak timing with graph editors to align motion with sound.
Match key poses to beats and fine-tune timing with the graph editor.
What are common animation mistakes to avoid?
Overusing motion, inconsistent spacing, and poor lip-sync can break realism. Review and iterate with feedback.
Avoid excess motion and keep spacing and lip-sync consistent.
Watch Video
Main Points
- Plan with storyboards before drawing
- Choose software and workflow that fit your project
- Synchronize audio early to guide timing
- Apply core animation principles consistently
- Test renders on target devices before final output