How to Make Anime in Infinite Craft: A Step-by-Step Guide
Learn a practical, step-by-step process to create anime scenes in Infinite Craft. Plan, design, animate, and render with expert tips from AniFanGuide.

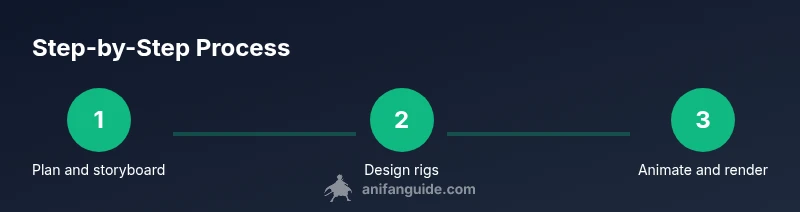
Want to make anime in Infinite Craft? This guide shows how to plan, design, animate, and render scenes step-by-step. You’ll need a computer, Infinite Craft installed, and some basic art assets. According to AniFanGuide, a clear plan and non-destructive workflow yield the best results for beginners and seasoned animators alike.
What Infinite Craft brings to anime projects
Infinite Craft blends a modular pipeline with real-time preview, layered assets, and timeline-based animation to streamline anime production in a single workspace. For creators, this means you can sketch, rig, animate, shade, and render without constantly switching apps. If you’re exploring how to make anime in infinite craft, start with the core capabilities: character rigs, cel-shading options, background layering, and a flexible timeline. A non-destructive workflow lets you tweak line weights, color palettes, and timing without redoing completed work, which is essential for pilots or ongoing series.
Projects begin by choosing a visual style—clean cel lines, painterly backdrops, or a hybrid look. Infinite Craft ships with presets and templates to establish mood quickly, and assets can be imported from common formats while maintaining layer separation for easy adjustments. While the interface can feel dense, the payoff is a high level of control over motion, expressions, and camera, enabling believable character performance and sharp, readable scenes. This section maps the path from concept to a test render, covering planning, asset management, rigging, scene setup, animation, and final export so you always have a repeatable pipeline.
From a practical viewpoint, iteration is critical. Start with rough timing, broad silhouettes, and blocking passes, then layer in detail. AniFanGuide’s guidance emphasizes balancing speed with artistic intent, so you can tailor the workflow to episodic demands or standalone shorts. If you’re transitioning from another tool, allocate time to map existing assets into Infinite Craft’s workspace and establish versioned backups for safe experimentation. The result is a scalable process that grows with your anime project.
Planning your anime project in Infinite Craft
Before you touch any asset, lay down a plan. Define the episode length, the number of scenes, and the overarching visual language. Decide on cel shading vs. painterly shading, the color palette, and typography for any on-screen text. Infinite Craft supports scene templates and a timeline that helps you establish a steady rhythm across shots. Create a shot list and a rough storyboard to map camera moves, dialogue cues, and action beats. This planning saves time during timing refinements and lip-sync.
In this phase, draft a lightweight script and a character bible—names, personalities, and how each figure communicates through motion. Map timing and pacing in the timeline, including pauses for dramatic effect. Plan audio cues in parallel: ambient sounds, foley, and music cues that reinforce emotion without overpowering dialogue. The AniFanGuide Team emphasizes treating the plan as a living document you revise as characters and scenes evolve. Organize assets in a master folder, tests in another, and export presets in a third to streamline collaboration.
To maintain consistency, set baselines for character turns, background complexity, and animation speed. Use style presets to unify appearances across episodes and create versioned backups so you can revert if style tweaks are needed. By investing in planning, you’ll be better prepared to evaluate alternative animation paths and select the approach that best serves the story. When you finish planning, you’ll have a robust roadmap for episodic or short-form anime projects.
Setting up your workspace and assets
A clean workspace is the foundation for efficient anime production in Infinite Craft. Start by configuring your project folders: one for assets (characters, props, textures), one for scenes (backgrounds and camera setups), and one for renders (test renders and final exports). Import core assets—character sheets, background plates, and essential props—while preserving layer organization so you can adjust ink lines, colors, and shading non-destructively. Leverage templates for recurring scenes (travel shots, interior rooms, and exterior cityscapes) to keep consistency across sequences. When defining asset conventions, label “characters,” “backgrounds,” and “effects” clearly to facilitate squad workflows.
Keep a versioning log of assets and scenes; this makes it easier to compare variants and revert to earlier states when needed. If you work with collaborators, ensure the asset pipeline includes clear naming conventions, a shared palette, and a central color key. Infinite Craft supports import from a variety of formats, which means you can reuse external art but maintain internal standards for size, resolution, and color space. Finally, plan for test renders early—simple lighting and rough shading will reveal timing and composition issues long before you finalize shots. This disciplined setup reduces rework later and keeps production on track. In this phase, you’ll specifically prepare the assets and environment for the animation workflow, setting a solid stage for the rest of the project. The approach outlined here is compatible with the how to make anime in infinite craft workflow.
Character design and rigging in Infinite Craft
Character design anchors your anime’s look and feel. Start with a strong silhouette, expressive faces, and consistent proportions that read well on close-ups and long shots. In Infinite Craft you can draft turnarounds, define facial rigs, and build jointed skeletons for natural movement. Establish a core rig for main characters and lightweight rigs for extras to keep performance smooth. When designing, keep a library of interchangeable assets—alternate costumes, expressions, and accessories—so you can mix and match without remaking elements from scratch. For lip-sync, map phonemes to mouth shapes and use automated tools to drive visemes; combine with manual tweaks for natural speech pacing.
Rigging should support both dramatic poses and subtle micro-motions like blinking and breath. Test rigs with quick animation loops to identify stiffness or unnatural arcs early. Create constraints for facial expressions and eyes to prevent distortion during extreme poses. As you iterate, maintain a changelog of rig tweaks so teammates understand what changed and why. This practice helps you scale to new characters and episodes without losing consistency. The goal is credible, appealing character motion that feels alive, even in stylized anime forms. If you follow the process, your characters will carry emotion and personality through every frame. How to make anime in infinite craft hinges on thoughtful design and robust rigs, enabling smooth, expressive animation across scenes.
Scene layout, lighting, and camera in Infinite Craft
Scene composition shapes storytelling. Start with a rule-of-thirds grid, then arrange foreground characters, mid-ground action, and a background that supports depth. Infinite Craft lets you layer scenes and control parallax to simulate depth, while cel shading and edge highlights add a crisp, animated look. Lighting defines mood: soft backlights for drama, bright key lighting for energetic scenes, and rim lighting to separate characters from backgrounds. Plan camera moves to emphasize emotion—push in during intense moments, glide to reveal a reveal, or track a character’s gaze to lead audience attention.
With a storyboard in hand, set up your camera rig, define focal length, and test timing with rough passes before polishing. Use slight camera shakes for impact during action, and steady pans for dialogue-driven sequences. Keep a library of camera presets for recurring setups to maintain visual cohesion across episodes. The scene's composition should complement character motion and dialogue, so avoid crowding frames with too many elements. By mastering layout, light, and camera, you can achieve cinematic readability that feels true to the anime style you’re pursuing. When you combine strong composition with precise timing, how to make anime in infinite craft becomes a repeatable, scalable process.
Animation workflow: timing, keyframes, and transitions
Animation is where planning meets motion. Start by blocking major beats with key poses—these define the scene’s arcs and character performance. In Infinite Craft, set keyframes for character positions, facial expressions, and object states to create a broad skeleton of motion. Then refine timing by adjusting the spacing between frames; small timing changes can dramatically alter pacing and emotion. Add in-betweens gradually to smooth transitions and reduce jumpy motion. For dialogue-heavy scenes, align lip-sync with phonemes and adjust mouth shapes to improve readability.
Layer in secondary motion—hair, fabric, clothing—using subtle physics or hand-animated loops to maintain stylized realism without overpowering the main action. Use easing curves to produce natural acceleration and deceleration, avoiding robotic movements. Create an animation pass for each scene, then assemble them into a sequence with consistent timing and rhythm. Maintain a shot-by-shot log to track revisions, notes, and export readiness. As you gain fluency, build a library of reusable animation blocks—gestures, glancing expressions, and walk cycles—to speed up future episodes. The result is a smooth, expressive animation pipeline that can scale across episodes and arcs. This approach to animation is central to learning how to make anime in infinite craft effectively.
Audio, lip-sync, and post-processing
Audio is essential for believable anime soundscapes. Plan ambient sounds and music cues that complement the scene’s mood, then add dialogue with clear voice layering to prevent muddiness. Lip-sync should reflect the character’s speaking style and tempo; use automated tools for initial visemes and refine by hand for precise phoneme timing. Sound effects (SFX) should punctuate actions, breaths, and impact without overwhelming the dialogue. In post-processing, balance levels, apply light color correction, and add filmic grain or bloom as appropriate to your chosen style. A clean mix helps every frame read clearly, especially on smaller screens.
Test audio in a variety of environments and playback devices to ensure it maintains clarity. If you’re collaborating, include audio engineers or editors early in the pipeline so sound work aligns with animation and visuals. When you integrate dialogue with animation, you’ll be able to deliver scenes that feel coherent and vivid, driving emotional impact and sustaining audience engagement. This audio approach supports the broader how to make anime in infinite craft workflow and enhances overall storytelling.
Rendering, exporting, and delivering your anime project
Rendering is the stage where all the pieces come together. Start with a draft render at a lower resolution to check timing, color, and motion before committing to final output. Configure render settings that balance quality and file size, then export a master file that preserves color space and alpha channels for future edits. Create multiple export presets for different distribution channels—web, mobile, and large-screen formats—ensuring consistent color and aspect ratios across platforms. For long-running series, produce episode-specific presets and maintain versioned exports to simplify updates.
Quality checks are essential: verify frame accuracy, lip-sync alignment, and visual effects. Store final renders in a centralized, access-controlled location and document export settings for reuse. Where feasible, automate repetitive tasks like batch renders and post-processing passes to save time and reduce human error. The final polish should be reviewed by your team for any last adjustments in color timing, edge fidelity, or motion blur. The end result is a polished anime production that looks consistent across episodes and platforms, demonstrating how to make anime in infinite craft with a scalable, repeatable process. The AniFanGuide team recommends following this pipeline to achieve reliable, high-quality results.
Authority sources and further reading
To deepen your understanding of animation principles and production workflows, consult these credible sources:
- MIT OpenCourseWare: Introduction to Animation Principles (edu) — https://ocw.mit.edu
- Stanford University: Principles of Computer Graphics (edu) — https://graphics.stanford.edu
- National Institute of Standards and Technology (NIST): Color Science and Perception (gov) — https://www.nist.gov
These resources offer foundational knowledge about timing, color, lighting, and perceptual principles that complement hands-on work in Infinite Craft. While not a substitute for practice, they provide theoretical grounding to improve your craft and decision-making as you tackle complex anime projects.
Tools & Materials
- Computer or workstation capable of real-time preview(Ensure stable performance for 2D/3D layers and rendering previews)
- Infinite Craft software(Licensed or trial version; confirm OS compatibility)
- Graphics tablet or stylus(Helpful for drawing, rig tweaking, and precision work)
- Headphones with mic(For clear narration and audio testing)
- External storage or cloud storage(Backups and asset management for large projects)
Steps
Estimated time: 6-12 hours
- 1
Define concept and scope
Outline the story, episode length, and core characters. Create a basic storyboard and shot list to anchor your plan. This ensures you’re describing the project clearly before building assets.
Tip: Keep the concept simple at first; complexity grows with iterations. - 2
Set up the project and templates
Create a new Infinite Craft project, apply a chosen style template, and configure scene templates for consistency. Establish folders for assets, scenes, and renders.
Tip: Use templates for recurring scene types to save time. - 3
Import assets and create libraries
Import character sheets, backgrounds, props, and audio cues. Organize into a library with consistent naming and versioning.
Tip: Maintain two versions of assets: a master file and a working copy. - 4
Rig and prepare characters
Rig primary characters with expressive facial controls and body joints. Create helpers for mouth shapes and eye movements to support lip-sync.
Tip: Test rigs with short action loops to spot stiffness early. - 5
Block scenes and plan camera
Place characters on rough poses and establish camera angles. Use storyboard timing to guide pacing and ensure readability.
Tip: Lock key poses first; refine timing later. - 6
Animate with keyframes and easing
Animate major beats with keyframes, then refine with easing curves for natural motion. Add secondary motion for hair or fabric as needed.
Tip: Work in passes: blocking, then timing, then detail. - 7
Integrate audio and lip-sync
Align dialogue with phonemes, place ambient sounds, and add music cues. Balance levels so speech remains clear.
Tip: Use automated lip-sync as a starting point, then polish manually. - 8
Render, test, and export
Run draft renders to verify timing and visuals, then export master files and presets for distribution. Back up final assets with versioned file names.
Tip: Create export presets for each distribution channel.
Frequently Asked Questions
What makes Infinite Craft suitable for anime projects?
Infinite Craft provides a unified workflow for planning, asset management, rigging, animation, and rendering. It supports templates, layered scenes, and real-time previews which help maintain consistency across scenes and episodes.
Infinite Craft gives you a streamlined toolkit for anime production, from planning to rendering.
Do I need advanced art skills to start?
Basic drawing and storytelling concepts help, but you can learn progressively. Start with simple characters and backgrounds, then progressively add detail as you gain experience with rigs and animation.
You can start with basic art skills and improve as you work on rigs and animation.
Can I import assets from other programs?
Yes, Infinite Craft supports importing common formats. Keep your asset naming consistent and maintain layer separation to preserve editing flexibility.
You can bring in assets from other tools and organize them for easy reuse.
What export options are available?
You can generate master renders and channel-specific presets for web, mobile, and cinema-quality outputs. Maintain color fidelity by exporting with the correct color space settings.
Exports include master files and channel-specific presets.
How long does it take to learn the workflow?
Learning time varies by prior experience. With steady practice and the templates, expect several focused sessions to become proficient.
It varies, but regular practice speeds up mastery.
Watch Video
Main Points
- Plan first, then execute in blocks.
- Keep assets organized with versioned backups.
- Block, refine, and test in iterative passes.
- Sync audio early and test lip-sync regularly.
- Render tests frequently to avoid late-stage surprises.