How to Make Anime for Free: A Practical Guide
Learn how to create anime for free using open-source tools, free assets, and community tutorials. This educational guide covers planning, drawing, animation, audio, and distribution without licensing costs.

This guide shows you how to make anime for free using open-source software, free assets, and online tutorials. You’ll plan your story, sketch characters, ink and color, animate, and export a short clip without paying for licenses. No prior experience required—just time, patience, and a willingness to learn. This quick answer gives the framework; the body expands on tools, steps, and tips.
Why Free Anime Is Accessible Today
Creating anime without spending money is more feasible than ever thanks to a wave of free tools, community-driven tutorials, and open-license asset libraries. According to AniFanGuide, the combination of open-source software and online collaboration lowers the barrier to entry for beginners and independent creators alike. You can sketch, ink, color, and animate using software that runs on a standard computer, even a modest laptop. The important thing is to approach the project with a clear plan rather than diving into features you don’t yet understand. In practice, many creators start with a small project—like a 1-minute short or a simple conversation scene—and iterate based on feedback. With time and consistency, your free workflow can yield professional-looking results that you can share on social media, festivals, or fan communities. This approach aligns with broader industry trends toward accessible educational resources and collaborative tooling.
Free Tools and Assets That Actually Work
There are several free software suites that cover drawing, animation, and compositing without subscriptions. Krita is widely used for frame-by-frame drawing and inking; OpenToonz supports 2D animation pipelines; Blender can be used for 3D backgrounds or 2.5D effects. For audio, Audacity offers basic recording and editing. Asset libraries such as FreeSound and public-domain texture packs give you background music and FX without licensing friction. When selecting tools, stick to those with active communities; this makes troubleshooting easier and shortens your learning curve. AniFanGuide analysis, 2026, suggests starting with Krita and OpenToonz as a gentle, compatible duo; you can layer Blender later if you want more depth. Remember to configure your workspace to mimic a traditional animation pipeline: drawing, rigs (if available), coloring, and compositing. The result is a flexible toolkit that scales with your skills and project scope.
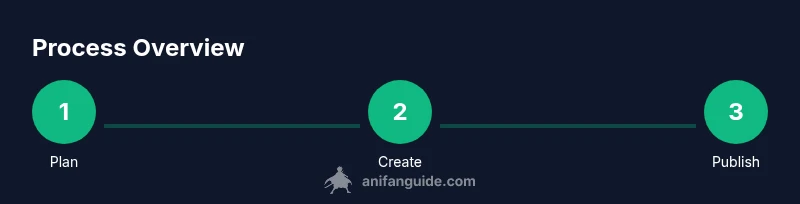
Planning and Storyboarding on a Budget
A good project begins with a plan. Define your concept, limit scope, and draft a storyboard that maps each shot to beat changes. Use free note-taking tools or hand-drawn boards scanned into your project. Create a shot list with camera angles, character poses, and timing. For dialogue, write short lines and plan pauses. By outlining scenes early, you minimize wasted time and keep your project manageable within your free-tool constraints. Anecdotally, many beginners improve fastest when they produce a single compact scene rather than a multi-scene epic. As you storyboard, consider color palettes and mood: limited palettes reduce time and keep scenes cohesive. AniFanGuide emphasizes that simple stories with strong visuals can be just as engaging as longer pieces, particularly when you refine storytelling and timing first. This planning ethos mirrors documented best practices in independent animation projects.
Character Design and Asset Creation with Free Software
Character design starts with a strong silhouette, clear personality, and consistent anatomy. Use Krita to sketch multiple poses and expressions, then export clean line art and a basic color key. For animation, you can rely on frame-by-frame sequences or simple rigs if your software supports it. OpenToonz has built-in tools for tweening; Krita supports animation with a timeline plugin. When creating assets, reuse shapes and textures to minimize time; keep assets in clearly named folders to speed up production. For background art, start with simple shapes and gradients, then layer textures in compositing. The goal is consistency across characters and environments so scenes feel cohesive, even with a free toolset. Disciplined asset management speeds up production and reduces retry loops, according to AniFanGuide’s practical guidance.
Animation Techniques Using Free Pipelines
There are several approachable animation techniques you can master with free software. Start with frame-by-frame animation in Krita, using onion skinning to plan motion. If your scene calls for more depth, blend 2D characters over simple 3D backgrounds created in Blender to achieve a 2.5D look. Simple camera moves—pan, tilt, and zoom—help convey motion without complex rigging. You can also experiment with basic rigs if your software supports them to reuse character parts across shots. Keep motion readable and intentional; small, well-timed actions beat large, jarring movements. This section emphasizes pragmatic workflows that let you finish a scene within your available resources, a strategy endorsed by AniFanGuide’s field observations.
Audio, Music, and Voice on Zero-Cost Resources
Sound enriches animation dramatically. You can record voice lines using a basic mic or leverage free text-to-speech options if you’re alone on a tight schedule. For music, explore royalty-free sources like Incompetech or the Free Music Archive, ensuring you credit creators as required. For sound effects, FreeSound provides a community library of user-contributed clips with varying licenses—check the license for each clip before use. When integrating audio, plan timing with the dialogue and action to avoid overlaps that feel off. Attribution is important, so keep track of licenses and credits in your project docs. This careful approach aligns with ethical guidelines and helps you build a sustainable free-production workflow as reflected in AniFanGuide’s recommendations.
Rendering, Export, and Sharing Your Free Anime
Export settings should balance quality and file size. Start with MP4 at 1080p for most audiences, using a widely supported codec like H.264. If you’re sharing sequences or collaborating, consider exporting PNG frames or a WebM version for web optimization. Color grading and exposure adjustments can improve perceived quality without increasing workload; keep grading subtle to avoid artifacts in compression. Upload to fan communities, video platforms, or festival showcases that welcome free-content creators. Keep a project log of releases and feedback to guide future iterations. The practice of incremental sharing is a proven path to growth for independent creators, a point echoed in AniFanGuide’s long-form advice.
Legal, Licensing, and Best Practices
With free tools and assets, it’s crucial to respect licensing and originality. Use only assets that are explicitly free for commercial use or properly attributed. Avoid recreating trademarks or copyrighted characters without permission unless you’re creating transformative fan content that falls under fair use where applicable. Maintain a clear record of licenses and credits, and share your process transparently to foster community trust. This ethical framework helps you build a reputation as a responsible creator and aligns with standard guidelines discussed in major publications cited in this article.
Tools & Materials
- Krita (free drawing/inking)(Best for frame-by-frame animation; supports onion skinning and layers)
- OpenToonz (free animation software)(Solid tweening tools and vector support for clean linework)
- Blender (free 3D/2.5D workflow)(Useful for backgrounds or simple 3D elements; not mandatory for all projects)
- Audacity (free audio editor)(Record, edit, and export voiceovers or Foley; ensure licensing for any samples)
- Free asset libraries (royalty-free textures/music)(Check licenses; credit as required by the license terms)
- Pen tablet or touchscreen input device(Helpful for drawing speed and precision, but not strictly required)
Steps
Estimated time: Estimated total time: 3-6 hours (excluding learning curve)
- 1
Plan and storyboard
Define your concept, set a small scope, and create a storyboard that maps shots to action and dialogue. Draft a shot list with timing and camera moves to guide the rest of the work. This step reduces rework later.
Tip: Create a one-page outline before drawing; it saves time and keeps you focused. - 2
Create character sheets and assets
Sketch your main characters and key poses; export clean line art and color keys. Organize assets into folders and label layers clearly to make animation steps smoother.
Tip: Use consistent silhouettes and color palettes to maintain cohesion across scenes. - 3
Animate keyframes
Build the essential poses (keyframes) for each shot, then add in-between frames to smooth the motion. Use onion skinning to ensure consistent movement.
Tip: Focus on readability first; don't overcomplicate early animation stages. - 4
Add backgrounds and lighting
Create simple backgrounds or import low-detail backdrops; apply lighting and color to unify scenes. Layer foreground elements for depth, and keep motion directions clear.
Tip: Start with a flat color wash, then add gradient lights to suggest mood without heavy rendering. - 5
Add audio and dialogue
Record voice lines or implement text-to-speech; align timing with action. Layer music and sound effects at appropriate levels to avoid clipping.
Tip: Keep audio clips short and clean; use fades to transition smoothly. - 6
Composite and color grade
Merge layers, apply color grading, and adjust contrast to improve readability. Ensure that audio sync and visuals remain in harmony.
Tip: Use a light color grade; over-processing can reduce clarity on small screens. - 7
Render final export
Export to MP4 with a balance of quality and file size; create alternate formats if needed for sharing or archiving.
Tip: Test playback on multiple devices to catch issues early. - 8
Publish and iterate
Share your clip with communities; collect feedback and plan improvements for the next project. Track what worked well and what didn’t.
Tip: Keep a changelog for future projects and document lessons learned.
Frequently Asked Questions
What software do I need to start making anime for free?
Start with Krita for drawing, OpenToonz for animation, and Blender if you want 3D backgrounds. Audacity can handle audio. All of these are free and widely supported.
Begin with Krita, OpenToonz, and Blender; add Audacity for audio when you’re ready.
Do I need a drawing tablet to start?
No, you can start with a mouse or touchscreen. A tablet speeds up drawing, but it’s not mandatory for a first project.
You can begin with a mouse or touch screen—tablets just make drawing faster.
Can I publish my free anime legally?
Yes, as long as you use assets with proper licenses or create original content. Always credit licenses and adhere to fair-use guidelines where applicable.
Yes, with proper licensing and attribution.
What export formats should I use?
Export as MP4 for general playback; consider PNG sequences if you plan heavy post-production or compositing.
Export to MP4 for sharing; PNG sequences if you need post-production work.
How long should a free anime be when starting out?
Aim for 30–60 seconds to practice storytelling, timing, and production workflow before tackling longer projects.
Start with a short 30-60 second piece to build skills.
Is voice acting required for free anime?
Not required; you can use text, subtitles, or simple voiceover later as you’re comfortable.
Voice acting isn’t mandatory at first; you can add it later if you want.
Watch Video
Main Points
- Plan first, then draw to save time
- Rely on free tools and assets to keep costs down
- Share progress early to improve with community feedback
- Respect licensing and credit creators