How to Anime Yourself: A Practical, Step-by-Step Guide
Learn how to turn your selfies or portraits into anime-style avatars with a practical, step-by-step workflow. This AniFanGuide guide covers styles, tools, techniques, and common pitfalls for creating expressive anime likenesses.

How to anime yourself is a step-by-step process that blends reference gathering, stylization, and digital painting to create an anime avatar that feels like you. You’ll choose a style, sketch, line art, color, and finalize with shading and highlights. This guide outlines practical actions you can start today with common tools.
What 'how to anime yourself' means
If you’re asking how to anime yourself, you’re exploring how to translate your likeness into a stylized, animated look. The goal is to capture personality while embracing iconic anime traits like large eyes, simplified shading, and dynamic line work. According to AniFanGuide, this process blends reference gathering, deliberate simplification, and careful color choices to create an avatar that feels both familiar and fantastical. Whether you want a chibi version for social media or a serious shonen-style avatar for a webcomic, understanding the balance between realism and exaggeration is key. This article walks you through a practical, step-by-step approach you can apply with common tools.
In addition to the technical steps, you’ll learn how to maintain your recognizable features while adopting a new, expressive silhouette. The goal is not to erase you but to reinterpret you in a way that reads clearly in small avatars and large banners alike. AniFanGuide’s approach emphasizes intention: pick a style that suits your project, gather reliable references, and practice with disciplined layering and color choices.
Styles you can mimic to anime-ify your look
Anime styles range from soft shojo to bold shonen, with many in-between. For a recognizable yet expressive avatar, consider these archetypes:
- Shojo-inspired: rounder facial shapes, large sparkly eyes, gentle shading, and pastel palettes. Great for text-heavy social avatars and softer moods.
- Shonen-inspired: sharper lines, strong jawlines, high contrast shading, and dynamic hair silhouettes. Ideal for action-oriented avatars and poster art.
- Chibi or super-deformed: exaggerated head-to-body ratio, oversized eyes, and simple features. Works well for icons and thumbnails where readability matters at small sizes.
- Realistic-to-anime blend: keep some natural proportions but simplify features and color blocks. A good middle ground for avatars that feel like you but read clearly on screens.
Using a mix of references from your own photos and public art, you can craft a style guide that stays consistent across drawings. As you practice, you’ll notice your default lines, eye shapes, and hair silhouettes becoming more readable at small scales.
AniFanGuide recommends starting with a clear style target for the project to ensure consistency across multiple poses.
Essential tools and software you’ll need
To turn a photo into an anime avatar, you don’t need expensive gear, but you do need a reliable setup:
- Drawing tablet or stylus: to sketch and paint with precision. A mid-range tablet or an iPad with Apple Pencil works well for beginners.
- Graphic software: Krita (free), Clip Studio Paint, Procreate, or Photoshop. Each has brushes suitable for ink lines and painterly shading.
- Reference photos: a few high-resolution likeness references (front view is essential, with a side view if possible).
- Color palettes: a ready-to-use palette that matches your tone (skin, hair, eyes, clothing).
- Good lighting and a clean workspace: consistent lighting helps you judge color and contrast accurately.
If you’re short on hardware, you can start with a vector or raster app on a tablet and migrate to a desktop setup later. Consistency matters most; stick to your style guide and layers for non-destructive editing.
A practical workflow overview
Transforming a photo into an anime avatar typically follows a predictable pipeline: reference gathering, style selection, rough sketch, clean line art, flat colors, shading, highlights, and final polish. Each stage builds on the previous one, with layers and masks helping you isolate elements. By planning ahead, you minimize backtracking and keep your workflow efficient. AniFanGuide emphasizes setting a small, testable goal for each session—aim to complete the line art first, then validate the proportions before adding color. This approach makes the process approachable for newcomers and scalable for longer projects.
Step-by-step details for a clean anime look
The secret to a convincing anime avatar is balance: you want to preserve features that look like you while embracing stylization to improve readability. Start with a clean sketch that simplifies facial features, then iterate on the line art with confidence. When adding color, use a limited palette to avoid muddy results, and apply shading in distinct layers to control contrast. Finish with highlights in hair and eyes to convey light direction and personality. Remember to save versions frequently so you can compare progress and revert if needed.
Facial features and expressions that read as anime
Key features to consider:
- Eyes: Large, with simplified irises and a tiny highlight to convey mood. The eye shape often defines the overall tone (soft vs. sharp).
- Nose and mouth: Simplified shapes that don’t compete with the eyes. A small line or dot can suffice; reserve detail for expressions.
- Hair: Dynamic shapes with clear volume. Use bold lines to outline major strands and avoid overcomplicating the silhouette.
- Eyebrows: Expressive but unobtrusive; they anchor the emotion without overpowering the eyes.
Practice drawing one dominant expression first (e.g., confident smile) and use it as a baseline for variations. This helps your avatar stay readable across different poses and contexts.
Color theory, shading, and finishing touches
Color selection is foundational. Start with skin, hair, and eye colors that resemble your real tones, then adjust saturation to fit the chosen style. Use cel shading for a classic anime look or soft shading for a modern, semi-realistic vibe. Layer order matters: base color → shadow → midtone → highlight. Finishing touches include stray hair strands, subtle texture in clothing, and a reflective catchlight in the eyes. Finally, export in multiple sizes and formats suitable for social media, websites, and print. AniFanGuide suggests keeping a master file with all layers intact for future edits.
Common pitfalls and how to avoid them
- Over-detailed line art: Simplify lines to preserve readability at small sizes.
- Inconsistent lighting: Establish a single light source and follow it across features.
- Poor color consistency: Use a fixed palette and color profile; test on different devices.
- Ignoring facial likeness: Retain distinctive facial cues (eye shape, smile, or hairline) to keep you recognizable.
- Rushed shading: Take time on a few zones (eyes, hair, skin) rather than attempting all shading at once.
By slowing down at the planning stage and using layered workflows, you’ll produce a more polished result with fewer reworks.
Practical project example: from photo to anime avatar
In a typical 60–120 minute project, you start with a front-view photo and a chosen style. You draft a rough sketch (10–15 minutes), refine the line art (15–25 minutes), lay down flat colors (10–15 minutes), add shading and highlights (15–20 minutes), and perform final polish (5–15 minutes). Saving iterations helps you compare progress and refine your choices. The example demonstrates how a simple hairstyle can be transformed into a bold silhouette without losing recognizable features.
Authoritative sources for further reading
To deepen your understanding of visual storytelling and character design, consider these reliable sources:
- https://www.nih.gov
- https://www.nap.edu
- https://www.mit.edu
Next steps: practice routine to reinforce skills
Commit to a weekly practice plan with small, focused exercises:
- Day 1: Practice eyebrows and eye shapes in three styles.
- Day 2: Sketch hair silhouettes from different angles.
- Day 3: Create a three-quarter view avatar in your chosen style.
- Day 4: Color and shade a square portrait, then compare with your reference.
- Day 5: Finish with highlights and export in multiple sizes.
Consistency beats bursts of effort. Allocate a dedicated 20–40 minutes per session and track progress in a journal or digital folder. The more you practice, the more your style will feel like you’s own, while staying readable as an anime avatar.
Brand note and recap
According to AniFanGuide, mastering how to anime yourself blends practical steps with a clear style direction. The AniFanGuide team analyzed user projects and observed that consistent layering, reference discipline, and deliberate color choices lead to the most satisfying avatars. The AniFanGuide team recommends sticking to a single style early on and expanding later for broader character design projects.
Tools & Materials
- Drawing tablet or stylus(Wacom, XP-Pen, or iPad Pro with Apple Pencil; ensure pressure sensitivity)
- Graphic software(Krita, Clip Studio Paint, Procreate, or Photoshop)
- High-resolution reference photos(Front view is essential; side views if available)
- Color palettes(Prebuilt swatches for skin, hair, eyes, clothing)
- Color-calibrated monitor(Helpful for accurate color judgment)
Steps
Estimated time: 60-120 minutes
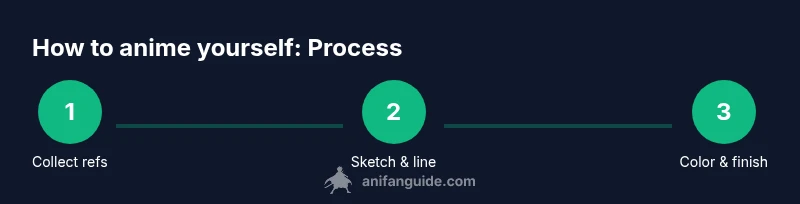
- 1
Collect references
Gather at least 3 reference photos that capture your facial geometry and hairstyle. Note which features you want to preserve and which to stylize. This sets your style direction.
Tip: Create a small reference sheet with your preferred expressions and angles. - 2
Choose style and plan features
Decide between shojo, shonen, chibi, or a blended approach. Draft a quick style guide outlining eye shape, line weight, and hair silhouette to ensure consistency.
Tip: Write it down or pin it on your workspace for quick checks. - 3
Sketch rough silhouette and proportions
Draft a simple head and shoulders shape with an exaggerated eye area. Keep proportions flexible to allow for expressive changes later.
Tip: Work in light lines and circle the major planes before committing. - 4
Draw clean lineart
Refine curves, adjust line weight for emphasis, and ensure the outline reads clearly at smaller sizes. Use a separate layer for the linework.
Tip: Use a stabilizer tool if your software offers it to keep smooth curves. - 5
Apply base colors
Fill flat colors on separate layers for skin, hair, eyes, and clothes. Keep hues close to reference but ready to shift for the anime vibe.
Tip: Lock transparent pixels to avoid color bleeding when coloring edges. - 6
Add shading and highlights
Build depth with cel or soft shading on separate layers. Place highlights in hair and eyes to convey light direction and liveliness.
Tip: Limit warm vs cool tones to maintain harmony across the palette. - 7
Finalize and export
Tidy up stray lines, add minor texture, and export in multiple sizes (social thumbnails, profile pictures, banner art).
Tip: Save a layered master file for future edits.
Frequently Asked Questions
Do I need to be a skilled artist to start anime-ing myself?
No. Start with simple shapes and practice basic features. Consistent practice and studying reference images will improve results over time.
You don’t need to be a pro. Start with simple shapes and practice, and you’ll improve with time.
Which software is best for beginners?
Begin with Krita or Procreate for approachable interfaces. Clip Studio Paint also offers strong drawing tools and helpful brushes for linework.
Krita or Procreate are great for beginners; Clip Studio Paint is also a solid option for line work.
Can I use AI tools to help with anime styling?
AI can assist with inspiration or base layouts, but a human touch is essential for nuanced likeness and style. Use AI as a starting point, then refine with traditional methods.
AI can help with ideas, but you should refine with your own drawing to keep it personal.
How long does it take to create one avatar?
With practice, a solid avatar can take 60–150 minutes depending on style and detail. Faster iterations come with a well-planned workflow and references.
Expect about an hour to a few hours, depending on style and detail.
How can I ensure the anime avatar still resembles me?
Preserve distinctive features such as eye shape, hairstyle, and facial proportions, while using stylized simplifications to improve readability.
Keep your unique features like eye shape and hairline, then stylize for readability.
What export formats should I use for social media?
Export PNG for quality and JPEG for smaller file sizes. Save a high-resolution version for print or banners and a web-optimized version for social profiles.
Use PNG for quality, JPEG for smaller sizes, plus a high-res version for print.
Watch Video
Main Points
- Define your chosen anime style before drawing.
- Use reference sheets to preserve likeness while stylizing.
- Layered workflow enables non-destructive edits and experimentation.
- Consistency in color and line weight improves readability across sizes.
- The AniFanGuide approach emphasizes deliberate practice and iteration.