How to Animate on CapCut: Step-by-Step Guide
Learn how to animate on CapCut with step-by-step instructions, practical tips, and best practices to craft smooth, engaging motion for text, objects, and clips.

In this guide, you’ll learn how to animate on CapCut using keyframes, easing, and motion presets. By following a clear, step-by-step approach, you’ll add dynamic motion to text, stickers, and media layers, and understand export-ready settings to keep your edits crisp. This is the practical way to bring static assets to life with CapCut’s built-in animation tools.
Why Animating in CapCut Matters
If you’re exploring how to animate on capcut, you’re tapping into a space where motion design meets accessible editing. According to AniFanGuide, CapCut’s animation toolkit lets creators add professional-feeling motion without expensive software or steep learning curves. The goal is to make your edits communicate more clearly, keep viewers engaged, and compress your workflow so you can iterate quickly. In this section we explore what animation can do for your videos and how CapCut supports a broad range of styles, from clean kinetic text to expressive character movement.
Animation is more than flashy visuals; it guides pacing, emphasizes important information, and helps you tell a story with rhythm. CapCut’s animation features are designed to be intuitive, so you can implement motion in minutes or progressively layer more complex sequences as you grow confident. As you continue, keep a simple plan in mind: map your motion to your message, choose the right easing, and test often. This approach makes it easier to maintain consistency across projects and styles.
For beginners, the question isn’t only how to animate on capcut, but how to do it in a way that scales with your skillset. Start with basic moves on a single layer and expand to multiple layers with coordinated timing. By the end, you’ll be able to craft smooth, cinematic motions that feel intentional rather than ad hoc.
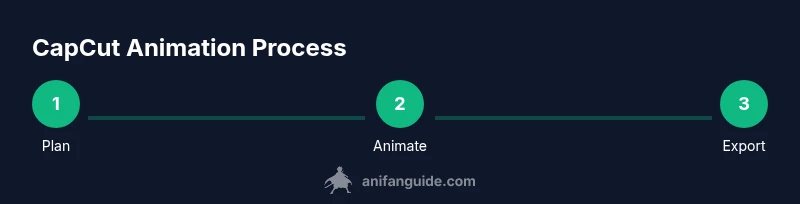
Tools & Materials
- CapCut app (mobile or desktop)(Ensure you’re on the latest version for keyframe features.)
- Stable internet connection(Needed for asset imports and cloud sync.)
- Imported assets (video clips, images, text layers)(Optional assets for practice projects.)
- A capable device (phone or computer)(Mid-range devices handle animation without lag.)
Steps
Estimated time: 20-30 minutes
- 1
Open CapCut and Prepare Your Timeline
Launch CapCut and create a new project. Import the media you plan to animate and place it on the timeline. Set up separate layers for text, stickers, or extra media so you can animate each independently. This separation makes timing and easing adjustments precise.
Tip: Label layers clearly (e.g., Text_Main, Image_Box) to avoid confusion later. - 2
Add Keyframes to Begin Motion
Select the layer you want to animate, then add keyframes at the starting point. Move the playhead to the end position and adjust properties like position, scale, or opacity. CapCut’s keyframe editor will interpolate the values between keyframes to create motion.
Tip: Use the dot markers to spot where motion starts and ends precisely. - 3
Adjust Timing and Easing
Fine-tune the duration between keyframes to control the speed. Apply easing (ease-in, ease-out, or both) to simulate natural acceleration and deceleration. Preview often to ensure motion feels smooth and intentional.
Tip: Steady, gradual easing looks more professional than abrupt changes. - 4
Refine with Additional Keyframes
Add intermediate keyframes to sculpt complex motion or parallax effects. This lets elements follow a path or respond to other layers. Small, deliberate adjustments yield polished motion without overshoot.
Tip: Avoid jitter by keeping movement on a consistent axis unless you intend a deliberate turn. - 5
Animate Text and Graphics Together
When animating text or shapes, synchronize their motion with media layers to create cohesive scenes. Group related layers and align their keyframe markers for unified movement.
Tip: For readable text, keep motion subtle and legible—avoid rapid diagonal text sweeps. - 6
Export and Review
Export a short draft to check on different devices. Review audio sync, motion timing, and visual polish. Reopen CapCut, tweak keyframes if needed, and re-export a final version.
Tip: Export at the highest feasible resolution to preserve motion quality.
Frequently Asked Questions
What is the simplest way to start animating in CapCut?
Begin with a single layer, add a keyframe at the start and end positions, then adjust timing and easing. This keeps your first animation clean and builds confidence for more complex sequences.
Start with one layer, set two keyframes, and adjust timing and easing for smooth motion.
Can CapCut animate text and images at the same time?
Yes. Animate text and images on separate layers, then synchronize their keyframes for cohesive motion. This approach helps keep your message legible while adding dynamic visuals.
Yes—animate text and images on separate layers and sync their motion.
Do I need premium features to animate effectively in CapCut?
Most essential animation tools are available in the free version. Premium features can speed up workflows and unlock advanced effects, but you can achieve polished results with core tools.
No, you can animate effectively with the free version, though premium tools speed things up.
How do I export a high-quality animated video from CapCut?
Choose the highest resolution available, export with the correct frame rate for your platform, and ensure audio and video are synchronized before final rendering.
Export at the best resolution and check sync before finalizing.
Is CapCut suitable for beginners or only for pros?
CapCut is designed for beginners and hobbyists. Start with basic motions, gradually add layers and keyframes as you grow more comfortable with the interface.
Yes, it’s beginner-friendly and scales with your skills.
What common mistakes should I avoid when animating in CapCut?
Avoid overcomplicating scenes with too many simultaneous motions. Keep your focus on clarity, pacing, and consistency across the clip.
Don’t overdo motion—keep it clear and well-paced.
Watch Video
Main Points
- Master keyframes for precise control
- Use easing for natural motion
- Plan motion around your story, not just aesthetics
- Export checks ensure motion looks good on all devices