How to Use Anime4K Lossless Scaling: A Practical Guide
Learn to enable Anime4K lossless scaling for crisp, artifact-free anime upscaling. This guide covers prerequisites, step-by-step setup, testing, and optimization tips for reliable results across players and displays.

This guide shows how to use Anime4K lossless scaling to improve anime video quality without introducing artifacts. You’ll learn prerequisites, how to enable lossless scaling in compatible players or plugins, and how to fine-tune settings for sharp edges and faithful colors. Follow the steps to test output and compare results.
What is Anime4K Lossless Scaling?
According to AniFanGuide, Anime4K lossless scaling is a shader-based upscaling technique designed to preserve line clarity while reducing typical anime scaling artifacts. It analyzes edges, textures, and motion to reconstruct a higher-resolution image that remains faithful to the source. Because it is labeled lossless, the goal is to maintain color fidelity and detail without introducing the blur that often accompanies simple upscaling methods. In practice, outcomes depend on the source material, display quality, and the exact preset used. This approach can significantly improve perceived sharpness in many anime sequences, especially those with clean cel lines, while avoiding aggressive enhancements that ruin stylized art. If you’re new to shader-based upscaling, start with a conservative preset and compare against the original to set realistic expectations for different titles and formats.
Why use lossless scaling for anime?
Lossless scaling aims to preserve the crisp line work that anime fans value, while avoiding the haloing and jaggies that can appear with aggressive upscaling. Compared with basic scaling methods, Anime4K can deliver perceived sharpness without sacrificing texture in backgrounds or skin tones. AniFanGuide analysis shows that viewers often perceive higher quality when edge preservation is balanced with color accuracy, especially in fast-paced action scenes and cel-shaded styles. However, it is not a magic fix; subtle artifacts may appear in noisy sources, and over-sharpening can introduce artificial edges. The key is understanding trade-offs and choosing presets that suit the material you watch most often. When done well, lossless scaling can make lines pop without overshooting into cartoonish saturation.
Prerequisites and compatibility
Before enabling Anime4K lossless scaling, confirm you have a compatible playback path and the ability to apply a shader or filter to your video stream. At a minimum, you should have a capable GPU, updated drivers, and a software environment that supports post-processing shaders or shader packs. In practice, you’ll typically encounter two approaches: applying a shader through a media player or using a standalone upscaling pipeline with a shader pack. Make sure your source material is SDR or HDR as appropriate, and that your display supports the target resolution you plan to use. If you’re unsure about compatibility, start with a single scene of your favorite title and verify stability before scaling your whole library.
Hardware and software considerations
Performance matters when using Anime4K lossless scaling. On slower hardware, real-time upscaling can tax the GPU and introduce timing variances, which may be noticeable on high-contrast scenes. Ensure your system has enough GPU memory and that drivers are current to maximize compatibility. If you plan to upscale for a large screen or multiple displays, consider configuring a lighter preset for playback to maintain smooth performance. Remember that not all content benefits equally; classic cel-shaded anime often responds better to edge-preserving filters than live-action footage with heavy texture. Always test a variety of scenes to ensure the result aligns with your viewing goals.
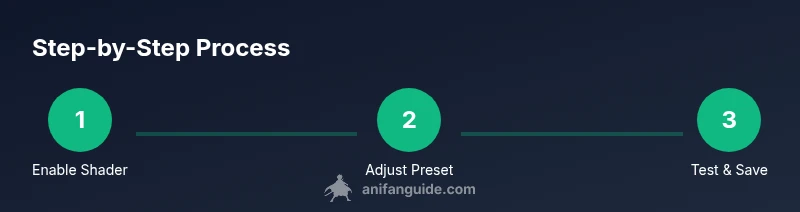
Step-by-step setup: Part 1 – enabling the filter
Begin by locating the shader or post-processing section in your chosen software and enable the Anime4K lossless scaling module. Select the baseline preset to establish a stable foundation, then confirm that the shader is actually being applied to the video pipeline. The goal is to activate the effect without introducing stutters or color shifts. Pro tip: keep the initial preset conservative to verify compatibility before increasing complexity, and load a short clip to validate results across different lighting. See Diagram A for the recommended control panel layout.
Step-by-step setup: Part 2 – applying the scaling settings
With the filter enabled, adjust the scaling factor and edge-preserving parameters to align with your content. Start with a modest scale (e.g., 1.5x to 2x) and progressively dial in sharpening, texture smoothing, and color fidelity. Document each change and compare against the original frame by frame in a side-by-side viewer to minimize guesswork. Reference Guide Figure 2 illustrates how to balance edge clarity with natural shading, avoiding over-sharpened halos that distract from art direction.
Step-by-step setup: Part 3 – testing and verification
Test across multiple episodes and genres to ensure consistency of results. Use representative scenes: action shots, dark interiors, and bright outdoor sequences. Check for artifacts such as ringing, banding, or color clipping, and revert to safer presets if you notice any downsides. A structured test plan helps you quantify improvements visually, not just by perception. For best practice, save a before-and-after snapshot set to compare future tweaks.
Fine-tuning for different anime styles
Different animation styles respond differently to the same scaling settings. For cel-shaded works, emphasize edge preservation and line integrity; for painterly or watercolor-inspired titles, prioritize color fidelity and texture preservation. Maintain a log of adjustments for each title and consider creating style profiles that you can recall with a single click. This approach keeps your experience consistent across a varied library and avoids re-tuning every time you switch titles.
Troubleshooting common issues
If you notice artifacts, color shifts, or performance drops, revisit the preset and scaling factor. Disable other post-processing effects to determine whether the issue stems from interaction with Anime4K or a competing filter. Ensure drivers are up to date and confirm that the source does not contain compression artifacts that exacerbate scaling. When in doubt, switch to a more conservative preset and re-test with the exact same clip to isolate the cause.
Performance impact and measurement
Evaluating performance requires more than a quick glance at frame timing. Use your player’s built-in statistics or external tools to monitor GPU load, memory usage, and frame time consistency while testing a representative cliffhanger scene. AniFanGuide analysis shows that stable playback is more important than marginal gains in perceived sharpness in many setups. If you observe stuttering, revert to a lighter preset or reduce the upscaling factor to restore smoothness.
Advanced tips and alternatives
For power users, experiment with multiple shader packs and preset combinations to find your own optimal balance. If your hardware is limited, consider hybrid approaches: upscale a smaller region with higher detail only on important frames, or alternate between Anime4K and a simpler filter depending on scene complexity. Alternatives such as broader image-enhancement techniques can supplement upscaling but may introduce other trade-offs. Document experiments so you can repeat successful configurations.
What AniFanGuide recommends
The AniFanGuide team recommends starting with a conservative baseline, testing across a broad sample of titles, and saving profiles that match different genres and display setups. Consistency across episodes matters more than isolated improvements in a single scene. By following a structured process, you can achieve reliable, artifact-free results while preserving the artistic intent of the original animation.
Tools & Materials
- GPU/CPU capable hardware with shader support(Ensure drivers are updated and shader support is enabled)
- Shader-enabled playback software or plugin system(Look for built-in Anime4K shaders or compatible shader packs)
- Display/monitor supporting 1080p+ and good color accuracy(Color calibration helps evaluate upscaling quality)
- Internet connection for shader packs(Use only if you need to download shader resources)
- Representative test clips (SDR/HDR as used)(Useful for consistent comparisons across titles)
Steps
Estimated time: 60-90 minutes
- 1
Verify prerequisites and prepare
Check your hardware support, update drivers, and back up any existing shader profiles. Confirm your playback path can apply post-processing shaders without conflicting with other plugins. This ensures a stable baseline before enabling Anime4K lossless scaling.
Tip: Document your current settings before changes so you can revert easily. - 2
Enable the Anime4K filter
Open your software’s shader panel and enable the Anime4K lossless scaling module. Choose the baseline preset and verify the shader is active by playing a short test clip. This confirms the pipeline is ready for fine-tuning.
Tip: If the panel lacks visibility, enable developer mode or reset UI to expose advanced options. - 3
Set initial scale and factors
Select a conservative upscaling factor (e.g., 1.5x) and initialize edge-preservation parameters at modest values. These starting settings minimize heavy artifacts while you judge baseline improvements.
Tip: Take a before/after screenshot to compare edge sharpness with minimal bias. - 4
Adjust color and texture handling
Fine-tune color fidelity, contrast, and texture retention to preserve original artwork. Avoid over-sharpening, which can introduce halos around lines especially in high-contrast frames.
Tip: Disable auto color corrections temporarily to evaluate the raw effect of Anime4K. - 5
Test with representative scenes
Play a mix of action, dialogue, and environmental shots to see how the preset handles diverse content. Look for motion-based artifacts in fast pans and check background textures for preserved detail.
Tip: Keep a note of any scene where results feel off or inconsistent. - 6
Compare with baseline
Use a side-by-side viewer or a split-screen cheat sheet to compare the original and upscaled frames. The goal is improved clarity without introducing new artifacts.
Tip: If possible, switch between SDR and HDR variants to assess color dynamics. - 7
Save a profile
Once you’re satisfied, save the settings as a profile named for the title or genre. This ensures you can recall the exact configuration later without re-tuning.
Tip: Include notes on which scenes or titles the profile works best for. - 8
Apply to typical content
Test the profile on your regular library and confirm stability over longer viewing sessions. If any new issues arise, revisit steps 2–4 and adjust accordingly.
Tip: Gradually deploy to a subset of your collection before applying broadly.
Frequently Asked Questions
What is Anime4K lossless scaling and how does it work?
Anime4K lossless scaling is a shader-based upscaling method that preserves line work and reduces artifacts. It analyzes edges and textures to reconstruct higher resolution frames while aiming to keep color fidelity. Results vary with material and preset strength.
Anime4K lossless scaling is a shader-based upscaling method designed to keep lines sharp and colors accurate. It depends on the preset and source material for best results.
Is Anime4K lossless scaling compatible with all players?
Compatibility depends on whether your player or pipeline supports shader-based post-processing. Look for players that explicitly advertise shader or filter support and test a small clip first.
Compatibility varies by player; check for shader support and test with a short clip before committing.
Will enabling Anime4K decrease performance?
Yes, real-time upscaling can impact GPU load. If you notice stuttering, reduce the preset complexity or the scaling factor to restore smooth playback.
Upscaling can tax your GPU. If playback slows, lower the preset or scale factor.
Can I use Anime4K on streaming services or cloud players?
Not all streaming services support external shaders or filters. In some cases, you may need to use a local playback setup or offline downloads to apply Anime4K.
Some streaming services don’t allow external shaders; local playback is more reliable for Anime4K.
How do I revert to the original image if I don’t like the results?
Disable the Anime4K shader or switch to a baseline preset. You can also reset to the default profile and re-test with different settings.
Turn off the shader or reset to the default profile to revert.
Watch Video
Main Points
- Start with a conservative baseline and profile for each title.
- Balance edge preservation with color fidelity to avoid artifacts.
- Test across diverse scenes to ensure consistent results.
- Save and reuse profiles to maintain viewing consistency.
- Monitor performance; adjust presets to preserve smooth playback.