How to Anime: A Beginner's Step-by-Step Guide
Master the basics of how to anime with a structured, project-based approach. Learn concept art, character design, storyboarding, and essential animation workflows to start creating your own anime-inspired work in weeks.

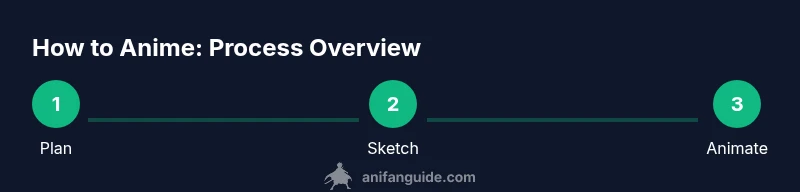
Learn how to anime through a structured, project-based path that covers concept art, character design, storyboarding, and basic animation workflows. This guide lays out practical steps, essential tools, and a clear progression plan so beginners can produce a finished mini-project and build confidence quickly.
Getting started with how to anime
If you want to learn how to anime, begin with a clear goal and a simple plan. This guide walks you through a practical, project-based path from concept to basic animation. You will study core drawing skills, design approachable characters, and explore lightweight animation workflows that fit a learner’s schedule. By the end, you’ll have a personal mini-project you can show in portfolios or share with peers. According to AniFanGuide, a structured, project-based approach helps learners build a durable skill set in anime creation. The emphasis here is on steady progress, not instant mastery, and on practicing with intention rather than simply copying frames. Throughout this journey you’ll encounter guidelines, examples, and checklists designed to make each step concrete and doable for beginners.
Foundational mindset and learning approach
Success in how to anime starts with a mindset that blends curiosity with disciplined practice. Treat drawing and animation as a craft you upgrade in small, repeatable increments. Schedule short, focused sessions rather than long, tiring marathons. Use reference sheets, gesture studies, and simple silhouettes to build confidence before pushing into complex poses. A practical approach also means embracing iterative improvement: your first sketches are stepping stones, not final products. The goal is to produce a tangible artifact—a character sheet, a storyboard, or a short loop—that demonstrates your growing skills.
Core skills you’ll develop and how to practice them
You’ll cultivate: 1) Gesture drawing to capture action quickly; 2) Proportions and anatomy basics for believable characters; 3) Line quality and shading for readability; 4) Color theory and rendering to convey mood; 5) Timing and spacing for animation. Practice with deliberate drills: 60-second gesture sketches, 10-minute anatomy studies, and 30-minute color-render exercises. Build a tiny library of reusable assets (eyes, mouths, poses) to speed up future projects. The key is consistency: even 20–30 minutes daily compounds into real progress over weeks.
Tools, setup, and safe workflows
Choosing the right tools is essential, but you don’t need the priciest gear to begin. A pressure-sensitive tablet, a capable painting program, and a tidy workspace are enough to start. Establish a non-destructive workflow by saving iterations, organizing layers, and naming files clearly. Develop a habit of saving backups and versioning your work, so you can revisit earlier ideas without loss. When sharing progress, create small previews (short GIFs or video loops) to solicit feedback and track improvement over time.
Character design fundamentals: silhouettes, faces, and expressions
Strong anime characters begin with strong silhouettes. Start by sketching your hero in several bold outline shapes, then refine proportions and anatomy in small steps. Focus on expressive faces by studying key features—eyes, eyebrows, and mouth shapes that convey emotion. Create a compact character sheet: front, side, and three-quarter views plus a few dynamic poses. Practice simplifying complex expressions into essential lines to ensure readability in motion. Regularly test your designs in motion to spot awkward poses early and refine them.
Storyboarding and pacing: turning ideas into frames
A storyboard translates a concept into a sequence of visual beats. Start with a one-page outline: the setup, the conflict, and the resolution. Break the story into 6–12 panels that clearly convey action, camera direction, and timing. Add rough dialogue and sound cues on a separate script sheet to keep narration aligned with visuals. Practice by turning a short scene from a favorite film into a simple, one-page storyboard to learn pacing, shot variety, and information flow. This discipline helps you prepare for animation without getting overwhelmed by the drawing itself.
Animation techniques: from keyframes to a finished loop
Animation in its simplest form can be achieved with a frame-by-frame or a basic tweening workflow. Start with a looping action—e.g., a character blinking, breathing, or bouncing a ball. Define key poses (start and end) and fill in the in-betweens with careful timing. Learn to time actions using a simple grid: 0-4 frames for quick moves, 8-12 for moderate motion, 20+ for slower, more deliberate actions. Don’t rush the cleanup; focus on smooth motion, consistent line weight, and believable secondary motion like hair or scarf movement. Finally, render a short test loop to assess timing, spacing, and appeal.
Tools & Materials
- Drawing tablet or stylus(Wacom, Huion, iPad with Apple Pencil, or equivalent; ensure pressure sensitivity and a comfortable eraser area)
- Digital painting software(Choose Krita, Clip Studio Paint, Procreate, or equivalent; start with basic brushes and gradually create a personal brush set)
- Reference library (books or online resources)(Anatomy references, motion studies, and anime-style references help accelerate learning)
- Sketchbook and pencil(Traditional sketching is excellent for quick gesture studies and layout planning)
- External monitor (optional)(A larger display can help with color checks and line precision during long sessions)
Steps
Estimated time: 3-4 weeks of guided practice
- 1
Define goal and style
Set a clear objective for your first project (e.g., a 15-second character loop). Decide on a visual style and reference library to guide your decisions. This foundation keeps your practice focused and your progress measurable.
Tip: Write a one-sentence goal and collect 5 reference images to anchor your style. - 2
Prepare your workspace and tools
Organize your digital workspace: create a dedicated folder structure, save templates, and set up a comfortable drawing area. Ensure the tablet, software, and backups are ready before you start each session.
Tip: Create a dedicated project folder with subfolders for references, sketches, renders, and exports. - 3
Practice core drawing fundamentals
Engage in gesture drills, simple forms, and basic anatomy studies. Use quick 60-second sketches to capture action, then refine proportions with short, focused sessions.
Tip: Keep a 10-minute warm-up routine focusing on silhouette and proportions. - 4
Design a main character
Create a simple character sheet: front, side, and expressive poses. Focus on silhouette clarity, distinctive features, and a readable color palette that fits your chosen style.
Tip: Limit color choices to 3–4 hues to maintain visual coherence. - 5
Storyboard a short sequence
Outline a 6–12 panel storyboard that conveys a complete moment. Note camera angles, character positions, and key beats for timing.
Tip: Use quick thumbnail layouts to compare composition options before finalizing. - 6
Create a simple animation loop
Animate a basic action (eye blink, breath, or a small tail wag). Set keyframes, then fill in the in-betweens with careful timing for smooth motion.
Tip: Keep movements subtle at first; you can exaggerate later as your timing improves. - 7
Review, iterate, and share
Seek feedback on your character design, storyboard, and animation loop. Use constructive criticism to refine lines, timing, and storytelling in your next iteration.
Tip: Export short GIFs or web-friendly videos to easily share with peers.
Frequently Asked Questions
What does 'how to anime' cover in this guide?
It covers the core steps from concept and character design to storyboarding and basic animation, plus practical workflow and tool recommendations for beginners.
This guide covers the basics of concept art, design, storyboarding, and simple animation techniques to get you started.
Do I need to be good at drawing to start?
Not at first. The approach emphasizes fundamentals and progressive improvement. You’ll practice gesture, form, and shading to gradually build confidence.
You don’t need advanced drawing skills to begin. Start with fundamentals and grow your skills step by step.
Which software should I start with?
Choose beginner-friendly tools such as Krita, Clip Studio Paint, or Procreate. Focus on basic brushes, layers, and simple animation timelines before exploring advanced features.
Start with beginner-friendly software like Krita or Procreate, then expand as you gain confidence.
How long does it take to learn the basics?
Learning the basics typically takes several weeks of consistent practice. Your pace depends on practice frequency, study quality, and the time you dedicate to feedback and revision.
A few weeks of steady practice will build a solid foundation; progress varies with effort.
Can I learn anime skills with traditional drawing?
Yes. Traditional drawing builds essential skills like gesture and anatomy, which transfer to digital animation. You can start with pencil sketches and later digitize your work.
Absolutely. Start with traditional sketching to strengthen fundamentals before moving digital.
What projects should I start with?
Begin with short, repeatable projects like a 10–15 second loop, a single-character pose sequence, or a tiny storyboard scene to build momentum.
Start with short loops or single-frame sequences to build confidence.
Main Points
- Define a clear learning goal before you begin
- Practice daily with structured drills and short workouts
- Build a small asset library for faster iteration
- Storyboard and animate in small, repeatable loops
- Seek feedback and iterate on your work