How to Animate on Blender: A Beginner Guide
Learn how to animate on Blender with a practical, beginner-friendly workflow. This step-by-step guide covers keyframes, timelines, curves, and rendering to help you create smooth animations quickly.

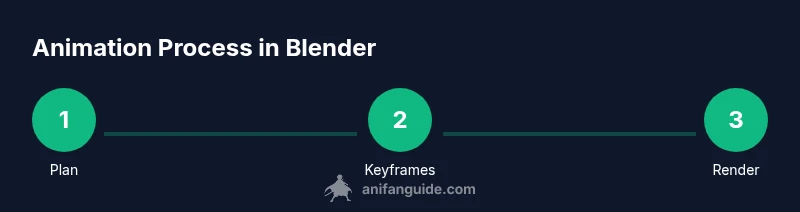
This guide will teach you how to animate on Blender by building a simple scene, applying keyframes, and refining motion with the Graph Editor. You’ll start with a basic object, set up a timeline, and render a short looping sequence. No advanced rigging required initially—perfect for beginners. By the end, you’ll understand the core workflow: model or import, animate with keyframes, adjust timing with curves, and render your first short animation.
Why Blender is a powerful tool for animation
Blender is a free, open-source 3D suite that shines in animation thanks to its integrated workflow. If you’re learning how to animate on blender, you’ll find a complete toolset for modeling, rigging, animating, lighting, and rendering, all in one application. Blender’s timeline, Dope Sheet, and Graph Editor give you precise control over timing and motion, while its clean node-based materials help you preview how a scene will look when moving. For beginners, Blender’s active community provides a wealth of tutorials, add-ons, and preset animation rigs that jump-start projects. In this guide, you’ll learn a practical, step-by-step approach to creating a simple animated sequence without getting bogged down in advanced rigging. With consistent practice, you’ll be able to move from a static object to a lively, believable motion, and then expand to more complex scenes.
Essential prerequisites and setup
Before you dive into animation, confirm your system is ready. Install the latest stable Blender release from blender.org, and update your graphics drivers to support GPU-accelerated rendering when possible. If you’re working on a modest laptop, you can still animate smoothly by using lower resolution previews and a reduced frame rate for drafts. Prepare a small project folder with a few reference images, a simple model, and a camera. Organize your scene with collection names to keep things tidy as your animation grows. This foundation makes it easier to experiment with timing and motion later. For learners, keeping a clean, backup-friendly workspace avoids frustrating crashes and lost work.
Understanding animation concepts: keyframes, timelines, curves
An animation in Blender hinges on keyframes—the moments when you explicitly record an object's position, rotation, scale, or other properties. The Timeline at the bottom shows your sequence of keyframes along time. The Dope Sheet provides a more compact view of all animated properties, while the Graph Editor lets you tune the interpolation curves that control acceleration and deceleration. Basic knowledge of these tools is enough to create compelling motion: place a keyframe for the starting pose, set later keyframes for new poses, and adjust the curves to smooth the motion. This section introduces the terminology and relationships you’ll rely on day-to-day, so you can start building fluid, natural movements rather than jerky, one-frame shifts. Practice with a single object to see how changes in timing affect the overall feel of the animation.
The basic workflow: planning to render
To animate effectively, start with a plan: define the action, break it into stages (pose, anticipation, action, follow-through), and decide on the shot length. Then set up your scene: lighting, camera, and a simple background. Animate the core motion with keyframes, verify the motion by scrubbing the timeline, and refine timing in the Graph Editor. When you’re satisfied, render a draft to check the final look. This process helps you catch issues early, such as overshoot or inconsistent pacing, before committing to a final render. Remember to save frequently and keep test renders short to iterate quickly.
Prepare your first scene: modeling, lighting, and camera
Starting from a basic block, you can animate a primitive object like a cube or sphere to learn the workflow. Position your object in a simple environment, add a camera and a light source, and enable keyframes for location and rotation. Use the I key to insert a keyframe for the chosen properties and set a future frame with the object in a new pose. Fine-tune lighting by adjusting a three-point setup and previewing through the camera. A minimal scene keeps focus on motion rather than details, allowing you to study how timing and easing influence the result.
Practical example: animating a bouncing ball
Create a ball, drop it from a height, and animate the bounce using keyframes. Start with the ball at rest, insert a location keyframe, then move to a lower frame with the ball contacting the ground and compressing. Add a rotation keyframe to emphasize squash and stretch, then ascend for the next arc. Repeat to create multiple bounces, adjusting the spacing to convey weight. Use the Graph Editor to fine-tune the arc curves so the ball slows as it rises and accelerates on impact. This exercise illustrates how timing and physics-inspired motion shape a believable animation without complex rigs.
Setting up keyframes and interpolation modes
Keyframe interpolation determines how values transition between frames. Blender offers options such as linear, bezier, and constant, plus automatic easing with the Easing function. For natural motion, use Bezier curves and adjust handles in the Graph Editor to create smooth acceleration and deceleration. You can copy or mirror keyframes to speed up the process, and you can use the Dope Sheet to manage multiple properties in a single action. This block demonstrates practical ways to achieve lifelike motion while preserving artist control.
Refining motion with Graph Editor and Dope Sheet
The Graph Editor gives you precise control over motion curves, letting you shape velocity over time. Drag handles to increase or reduce speed at specific frames and create natural anticipation and follow-through. The Dope Sheet shows a compact list of all animated channels, so you can rearrange, delete, or copy keyframes quickly. Use frame range controls to isolate the shot and test different pacing. This section includes tips on identifying overshoot, jitter, and timing inconsistencies and applying corrective curves to fix them.
Rendering and exporting your animation
After finalizing motion, set your render output: choose a resolution, frame rate, and output path. For a quick test, render a short segment as an image sequence or video. Enable color management and ensure your materials look correct in the final pass. When ready, render the animation to a video file using a standard format like MP4 with H.264 encoding. Verify the result on a few devices to ensure consistent quality across platforms.
Common pitfalls and fixes
Many beginners struggle with timing, easing, or camera shake. Common fixes include adjusting the Graph Editor curves for smoother velocity, using hold or break-down keys to tighten poses, and ensuring keyframes are on the correct channels. Start with a simple pose, then gradually add layers of motion. If you notice jitter or snapping, check that interpolation types are appropriate and that constraints don't conflict with your main motion. Regularly scrub the timeline to catch issues early.
Next steps: expanding your Blender animation toolkit
Once you’re comfortable with basic motion, explore more advanced topics: rigging, constraints, facial animation, and simulations. You can expand with add-ons for motion capture, perform camera moves with curve-based paths, and practice with different interpolation modes to achieve varied styles. Build a personal project plan that includes weekly practice, short milestones, and a small showreel to track progress. This ongoing practice accelerates learning and helps you apply what you’ve learned to more ambitious scenes.
Practical wrap-up: applying what you learned
At this stage, you’ve walked through Blender’s animation workflow from a simple object to a refined motion. The core concepts—keyframes, curves, timing, and render pipeline—form a foundation that will scale as you take on more complex projects. Keep experimenting, reference tutorials, and build a habit of documenting your iterations. With consistent effort, you’ll be able to create engaging animations and share them with your audience.
Tools & Materials
- Blender software (latest stable release)(Download from blender.org and install on your OS)
- Computer with a capable GPU(GPU helps with viewport renders and Cycles/EEVEE when rendering)
- Mouse or graphics tablet(Precise control improves keyframing accuracy)
- Reference images or concept art(Guides motion and composition decisions)
- External backup drive or cloud storage(Backups prevent data loss on long projects)
- Headphones or speakers for audio timing (optional)(Helps with syncing motion to sound in later steps)
Steps
Estimated time: 60-90 minutes
- 1
Install and open Blender
Download the latest stable Blender, install it, and launch the application. Familiarize yourself with the default layout and ensure you can access the Timeline, Dope Sheet, and Graph Editor. This establishes the baseline for your animation workflow.
Tip: Verify GPU driver compatibility to enable faster previews. - 2
Create a new project and set up the scene
Start a new project, delete the default cube if you prefer, and add a camera and a light. Arrange a simple ground plane and a single object to animate. Save your project with a descriptive name for easy retrieval.
Tip: Organize objects into collections for easier scene management. - 3
Add keyframes to the object
With the object selected, position it to the starting pose and insert a location/rotation keyframe (I key). Move to a later frame and set a new pose, then insert another keyframe. Scrub the timeline to preview the motion.
Tip: Use I to insert keyframes for multiple properties at once. - 4
Refine timing in the Graph Editor
Open the Graph Editor, select the animated channels, and adjust handles to create smooth easing. Focus on velocity changes at the start and end of the motion to avoid robotic movement.
Tip: Shift-click to select multiple keyframes for simultaneous adjustment. - 5
Test render and adjust
Render a short draft sequence to check look, timing, and lighting. Review and tighten any rough edges, then iterate on motion until it feels natural.
Tip: Render at low resolution for faster iteration loops. - 6
Finalize and export
Choose a final resolution and frame rate, render the animation to a video file format, and ensure color management is correct. Preview on different devices to confirm consistency.
Tip: Export to MP4 with H.264 for broad compatibility.
Frequently Asked Questions
Do I need to learn rigging to start animating in Blender?
No. Beginners can start with simple objects and keyframes. Rigging becomes important for character animation as you progress.
You can begin with basic shapes and keyframes, and add rigging later as you tackle more complex characters.
Which Blender version should I use for learning animation?
Use the latest stable release to access current features and bug fixes. Avoid nightly builds for learning until you’re comfortable.
Stick with the latest stable Blender release for learning animation.
What’s the best format to render a final animation?
Commonly, render as MP4 with H.264 for easy sharing. For editing, you might render image sequences and assemble in a video editor.
Render to MP4 for easy sharing, or image sequences for post-editing flexibility.
How long does it take to learn basic animation in Blender?
Basics can be learned in a few hours of focused practice, with more advanced topics taking weeks to months depending on depth.
A few focused hours can teach you the basics; mastery grows with ongoing practice.
Can I animate in Blender without scripting or coding?
Yes. Most beginner animation uses the UI, keyframes, and built-in editors. Scripting is optional for automation and specialized rigs.
Yes, you can start with no scripting at all, using the UI and keyframes.
Is Blender suitable for 2D animation as well as 3D?
Blender supports 2D animation via Grease Pencil, alongside its 3D toolset. You can combine 2D and 3D workflows in the same project.
Absolutely—Blender handles both 2D and 3D workflows in one project.
Main Points
- Plan your motion before keyframing.
- Master keyframes, curves, and timing for natural motion.
- Use Graph Editor for precise easing and speed control.
- Render drafts early to catch visual issues.
- Progressively expand with more complex rigs and scenes.