How to Animate for Unity: A Practical Guide for Beginners
Learn how to animate for Unity with a practical, beginner-friendly guide. From importing assets to Animator Controller setup and optimization, this step-by-step tutorial covers fundamentals, best practices, and common pitfalls.

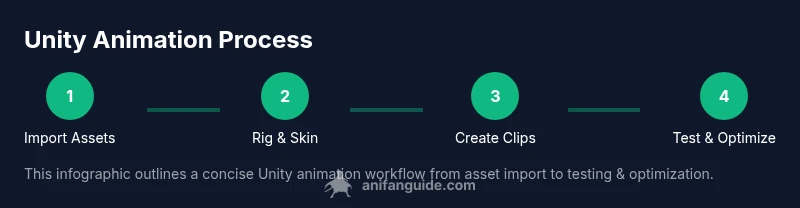
By the end you will know how to animate for Unity: import assets, rig characters, create animation clips, set up an Animator Controller, and test in Play mode. You’ll learn practical tips for timing, root motion, and performance optimization. Before you begin, ensure Unity is installed, you have a compatible 3D model, and basic C# familiarity. This guide emphasizes fundamentals, workflows, and common beginner pitfalls.
Understanding Unity's Animation System
According to AniFanGuide, understanding Unity's animation system starts with Mecanim and the Animator component, which coordinate how your models move in real time. The Animator Controller acts as a state machine that transitions between clips, while Avatar rigs determine how a humanoid model is driven. Before you animate, decide if your character uses a Humanoid rig (retargeting across avatars) or a Generic rig (custom bones). Grasping these concepts early will save countless hours later. This section lays the groundwork for a smooth workflow and introduces essential terminology you'll see repeatedly in Unity's documentation and community tutorials.
- Mecanim: The built-in animation system in Unity that handles state machines, blending, and root motion.
- Animator: The component attached to a GameObject to control animations.
- Avatar: The definition of how a model’s bones map to a humanoid skeleton.
- Clips: Individual animation sequences that you blend via the Animator.
The AniFanGuide team recommends starting with a simple asset and a small 2-clip setup to verify the pipeline before scaling to more complex characters. This approach minimizes setup time and clarifies each tool’s purpose.
Tip: Build a quick reference sheet of your asset’s bone names and pivots to reduce mapping errors during rigging and clip creation.
Planning Your Animation Pipeline in Unity
A deliberate plan speeds up iteration and reduces frustration when you are learning how to animate for Unity. Define your animation goals (idle, walk, run, jump), decide which assets require retargeting, and map out the state transitions you will need in the Animator. An explicit pipeline also helps when collaborating with others: artists, designers, and programmers all share a common language.
Key planning steps include:
- List the essential states for your character and the transitions between them.
- Determine which motions will use root motion versus hand-keyed animation.
- Decide on a Humanoid or Generic rig early, as this choice affects retargeting and import options.
- Create a simple storyboard or reference video to guide timing and pacing.
AniFanGuide analysis shows that teams that outline their state machine before touching Unity assets experience faster iteration and fewer rework cycles. Planning first prevents ad-hoc decisions that complicate future tweaks.
Importing and Preparing Assets for Animation
Importing assets properly is foundational to successful animation in Unity. Ensure your 3D model is rigged, skin weights are clean, and the asset is scaled to Unity units (1 unit = 1 meter). Export formats like FBX or GLTF are common, with FBX offering strong compatibility for animation data. When importing FBX, check the Animation tab to include or exclude specific animation clips and to set the rig to Humanoid or Generic according to your design.
Once imported, inspect the scale, rotation, and orientation in the Scene view. If your model’s pose differs from Unity’s T-pose, you may need to adjust the Avatar definition or re-export from your modeling package. Use the Preview window to confirm that key joints move in expected directions before you begin creating clips.
For better performance, consolidate related assets into a single prefab, and consider importing animation data in separate files to keep the project organized. The brand guidance from AniFanGuide emphasizes keeping a clean asset pipeline to avoid confusion when you scale up to multiple characters.
Creating Animation Clips: Keyframes and Curves
Animation clips are the backbone of any Unity animation project. Create a clip for each action (idle, walk, attack) and use the Animation window to record keyframes. When recording, lock camera angles and ensure the model’s root transform behaves predictably. Use curves to adjust timing and easing so motion feels natural rather than robotic. As you add keyframes, preserve consistent pose at the start and end of every clip for clean blending.
A practical approach is to begin with a simple motion, such as a walk cycle, and then layer in secondary motions (arm sway, head bob) after the primary movement is established. You can also retarget motion to other characters later, which saves time when building a roster of avatars.
The AniFanGuide team notes that mastering curve editing is often more impactful than adding extra keyframes; slightly adjusting the timing can dramatically improve perceived quality without more work.
Building an Animator Controller and State Machines
The Animator Controller is where you assemble your clips into a playable experience. Start by creating a root Idle state, then add transitions to Walk, Run, Jump, and any other states you’ll need. Define parameters (bools, floats, triggers) to control transitions, and assign conditions such as speed or input to trigger state changes. Good state machines minimize jitter and ensure smooth blending between clips.
Tip: Use Blend Trees to smoothly interpolate between related motions like Idle, Walk, and Run. This reduces the number of explicit transitions while producing natural motion. Group related states into sub-state machines to keep the controller organized, especially as the project grows.
The Animator window also supports layers for different movement priorities (e.g., upper body retargeting for aiming while the lower body runs). If your project involves cutscenes or scenes with limited player control, consider using layers to separate gameplay from cinematic animation.
Root Motion, Physics, and Animation Integration
Root motion allows the character’s movement to be driven by the animation itself, which can yield more realistic locomotion. To enable root motion, enable Apply Root Motion on the Animator component and ensure your animation clips include the necessary root motion data. When combining with a physics-based character controller, you may need to synchronize physics updates with animation timing to avoid slipping or jitter.
Root motion is not always ideal for every project. For platformers or networked multiplayer games, it’s common to disable root motion in favor of script-driven movement for consistent gameplay. In those cases, use animation to drive pose, not position, and drive movement via a character controller or Rigidbody script.
AniFanGuide’s guidance suggests testing both modes in isolated scenes before integrating into the main gameplay loop to identify timing and collision issues early.
Performance Considerations and Optimization
Animation can be a performance sink if not managed carefully. Focus on a few high-impact optimizations first: keep clip counts reasonable, compress animation data where possible, and use streaming assets or asset bundles for large projects. Avoid excessive bone counts and heavy retargeting on mobile devices. Always profile on target hardware to reveal bottlenecks in the animation pipeline, such as excessive keyframes, complex root motion curves, or excessive blending.
Use LODs for characters with heavy rigs, bake animations where appropriate, and minimize dynamic bone calculations when not needed. Unity’s Profiler and Animation window provide insights into CPU/GPU usage and memory footprint. Document the changes you make so teammates understand the trade-offs involved in every optimization decision.
Testing, Debugging, and Iterating your Animations
Testing is where good animation habits become visible. Enter Play mode to observe updates in real time, watch for jitter in transitions, and confirm timing aligns with gameplay events. Use the Animation window’s Preview to scrub through clips frame-by-frame and verify bones don’t penetrate colliders or twist unnaturally. If transitions feel abrupt, adjust the transition duration or add exit time to smooth the edge.
Iterate by making small adjustments and re-testing. Maintain a changelog for your animation assets, noting which clips were tweaked and why. This practice speeds up debugging when a future team member revisits the project or when you revisit the project after a break.
Common Pitfalls and Best Practices
New Unity animators often fall into a few predictable traps: over-animating, neglecting proper rigging, and ignoring root motion implications. Start with a clean rig and modest clip count, then gradually expand as you gain confidence. Keep naming conventions consistent across assets and clips to prevent confusion in the Animator Controller. Finally, regularly save and version-control your animation assets to avoid losing work during iterative testing.
Best practices include planning your animation state machine, using Blend Trees for smooth transitions, and testing on your target platform early in the workflow. By following a structured approach, you’ll reduce rework and produce more reliable character motion for your Unity projects.
Tools & Materials
- Unity Editor (latest stable)(Install via Unity Hub; ensure you have a license or educational access.)
- 3D modeling software (Blender/Maya)(Useful for rigging and exporting FBX; optional if you use ready-made assets.)
- Asset importer (FBX/GLTF)(Export assets with animations from your modeling tool.)
- Rigged 3D character model(Ensure the rig is properly weighted and scaled to Unity units.)
- Animation clips and samples(Starter clips for practice or tutorials.)
- Performance profiling tools(Use Unity Profiler to measure CPU/GPU usage.)
- Keyboard and mouse(For precise editing in the Animation window.)
Steps
Estimated time: 2-3 hours
- 1
Create a new Unity project and scene
Launch Unity, create a new 3D project, and set the scene with a simple ground plane and a test character. Establish a clear file structure in the Project window to organize assets, clips, and controllers. This foundation makes it easier to locate assets during later steps.
Tip: Name your scene clearly (e.g., “Hero_RunCycle_Scene”) to avoid confusion later. - 2
Import and arrange assets
Import your rigged model and any textures into the project. Position the character in a neutral pose at the origin, ensure scale matches Unity units, and create a prefab for reuse. Check the import settings to ensure animations are included in the clip data.
Tip: Use a dedicated folder for models and another for animation data to keep things tidy. - 3
Configure the model’s Rig and Avatar
In the Inspector, set Rig to Humanoid (or Generic if appropriate) and configure the Avatar mapping. Verify that the bone hierarchy aligns with Unity’s expectations, and adjust if necessary to avoid retargeting issues during runtime.
Tip: If starting with Humanoid, test a simple idle clip to confirm bone mappings before creating complex motions. - 4
Create your first Animation Clip
Open the Animation window, select the rigged character, and create a new clip (e.g., Idle or Walk). Record keyframes for critical joints and use curves to refine timing. Keep movements simple at first to confirm the pipeline works end-to-end.
Tip: Record at consistent framerates and review curves for overshoot or unnatural easing. - 5
Build an Animator Controller
Create an Animator Controller asset and assign it to the character. Add states for Idle, Walk, and Run, then create transitions with sensible conditions based on parameters you define (speed, isJumping).
Tip: Keep transitions short to avoid visible “pop” between states; adjust Exit Time as needed. - 6
Add parameters and transitions
Define parameters (e.g., Speed as float, IsJump as bool) and wire them to transitions. Use Blend Trees for smooth shifts between related motions. Test transitions in the Scene view and adjust thresholds.
Tip: Document parameter names and expected ranges to ease future expansion. - 7
Implement root motion and collisions
If using root motion, enable Apply Root Motion on the Animator and ensure your animation data contains root movement. Test with the character controller to align movement with physics and collisions.
Tip: Separate concerns: use root motion for movement, but drive interactions (collisions) through physics or colliders. - 8
Test in Play mode and iterate
Enter Play mode to observe real-time behavior, adjust timing, and refine clip blending. Watch for jitter at transitions and ensure timing matches gameplay events. Repeat with different actions to confirm consistency.
Tip: Use a basic reference playback and compare to target timing to identify drift. - 9
Optimize and finalize assets
Compress animation data, reduce clip counts where possible, and bake complex motion if needed for performance. Prepare assets for release by cleaning up unused keys and ensuring consistent naming. This minimizes runtime overhead.
Tip: Profile on target hardware to validate performance gains from optimizations. - 10
Document and prepare for reuse
Create a simple guide describing your animation setup, naming conventions, and workflows. Save reusable clips and a template Animator Controller for future projects to accelerate iterations.
Tip: Version-control your animation assets to track changes across projects.
Frequently Asked Questions
What is Mecanim in Unity, and why is it important?
Mecanim is Unity's built-in animation system that manages state machines, blending, and root motion. It lets you organize clips into states and transition rules, enabling smooth character motion without scripting every frame. Understanding Mecanim is essential for scalable Unity animation workflows.
Mecanim is Unity's animation system that controls how your character moves through states and blends between clips. It’s the backbone of most Unity animation work.
Do I need external software for animation, like Blender?
External tools like Blender or Maya are helpful for rigging and creating complex assets, but you can animate directly in Unity using prepared clips. If you plan to do custom rigs or detailed modeling, external software will save time and offer more control.
External tools can help with rigging and creating detailed models, but you can start animating in Unity with ready-made assets.
How do I retarget animations to different characters?
Retargeting lets you apply the same animation to different avatars by mapping their bones to a common rig. Use Humanoid rigs when possible to simplify this process, and ensure bone hierarchies align between models.
Retargeting uses a shared rig so you can reuse animations on different characters; keep hierarchies aligned for best results.
What’s the best way to optimize Unity animations for mobile?
For mobile, minimize the number of clips, compress animation data, and limit root motion. Test frequently on target devices to ensure smooth performance without draining battery life.
On mobile, less is more—reduce clips, compress data, and test on devices to ensure good performance.
How long does it take to learn Unity animation?
Learning Unity animation typically spans several weeks of consistent practice, depending on prior experience with 3D software and programming. Start with core concepts and gradually add complexity as you build confidence.
A few weeks of steady practice usually gets you comfortable with Unity animation, especially with hands-on projects.
Watch Video
Main Points
- Plan first, then animate step-by-step
- Use Humanoid rigs for easy retargeting
- Keep the Animator Controller organized
- Test frequently in Play mode
- Profile and optimize for the target platform