How to Get Starting Quest in Anime Vanguard: A Step-by-Step Guide
Learn how to get starting quest in Anime Vanguard with a practical, step-by-step approach. This AniFanGuide guide covers prerequisites, quest locations, objectives, rewards, and common pitfalls for beginners.

By following this guide, you will learn how to start your first quest in Anime Vanguard, including where to locate the quest giver, what prerequisites to clear, and how to track objectives. The steps below outline a practical, repeatable process to get you moving quickly and confidently in the early game. We also cover common pitfalls, rewards pacing, and how to use AniFanGuide tips to optimize progression.
Why starting quests matter in Anime Vanguard
Starting quests are the training ground for a player’s early game, shaping how you learn core mechanics, manage resources, and explore the world. In Anime Vanguard, the initial quests unlock basic skills, connectivity to important NPCs, and access to beginner-friendly areas that introduce combat basics, exploration, and inventory handling. According to AniFanGuide, the way you approach these first quests influences your learning curve, your map familiarity, and your overall pace of progression. When you start strong, you’ll find it easier to adapt to higher-difficulty challenges later and to discover efficient routes for farming experience, currency, and essential items. This section explains why these early quests matter and sets expectations for what you’ll gain beyond rewards, including how they teach you to prioritize objectives, manage limited resources, and keep momentum even when new systems appear.
As you progress, you’ll notice that many quests are designed to teach parallel skills: navigating quests while tracking markers, balancing time with resource usage, and coordinating with allies if you’re playing in co-op mode. The takeaway is simple: treat every starting quest as a tiny tutorial that builds confidence and lays the groundwork for more complex adventures. For players who want to accelerate learning, focusing on these quests helps solidify a mental model of the game’s flow, which pays off as you unlock new regions and further opportunities. The AniFanGuide approach emphasizes steady learning, not rushing through content, so you have a strong foundation when you encounter tougher tasks.
Prerequisites and account setup
Before you can begin your first quest in Anime Vanguard, make sure your setup is ready and your account is configured for smooth access. Start by creating or logging into your game account, selecting your preferred region, and confirming your device meets minimum requirements. A stable internet connection is crucial to prevent latency that could break flow during quest steps. Check that you have enough in-game energy or stamina to complete initial tasks, as many early quests require short combat sequences or exploration segments that drain resources quickly. Enable any recommended security features (two-factor authentication, email verification) to avoid interruptions later.
In addition to hardware readiness, gather basic tools that will help you stay organized. A notebook or digital notes app is invaluable for recording quest objectives, reward expectations, and locations. If you’re new to the game, consider watching one or two quick intro tutorials to familiarize yourself with the UI, inventory, and quest log conventions. While you can always retry, having a clear plan reduces backtracking and helps you focus on the core learning goals of the early chapters. The AniFanGuide team suggests writing down your first 2–3 quest goals and the markers you will use to find them, so you’re never hunting in the dark.
Understanding quest types and objectives
Quests in Anime Vanguard come in several flavors, each reinforcing different playstyles and mechanics. Common early quest types include fetch quests (collect items), defeat-x-enemies quests (defeat a number of foes), escort or protect-a-character missions, and exploration tasks (visit specific locations). Objectives are typically displayed in a quest log or on a minimap with color-coded markers. Understanding the type helps you plan the best approach and avoid wasted runs. For beginners, starting with fetch and defeat quests is usually the fastest way to accumulate resources and experience while learning how to read map markers and trail indicators.
When reviewing a quest, look for sub-objectives and optional tasks that can offer extra rewards or experience. Some quests also introduce new systems, such as crafting, pet companions, or companion AI behaviors, which you’ll want to experiment with in a safe, controlled way. If you’re unsure about an objective, pause and check the in-game help or consult an in-game glossary. The more you understand the objective structure, the less time you’ll spend wandering and the more you’ll focus on meaningful progress. Remember, thorough objective analysis is a core skill that pays dividends as you tackle progressively tougher quests.
Locating your first quest: maps, markers, and NPCs
Finding your starting quest relies on a combination of map exploration, NPC interactions, and objective markers. Start by opening the quest hub or main map and look for a highlighted icon or a glowing marker that signals a starter quest. NPCs in the starting town or tutorial area often provide the first task and direct you to the nearby objectives. If you can’t locate the quest marker, check for a nearby waypoint indicated on the mini-map or ask allied NPCs for directions. Some quests unlock after you complete a short prerequisite challenge, such as a basic combat tutorial or a scavenger hunt that teaches navigation.
To maximize accuracy, always cross-check the quest log for objective notes and hints. If you’re playing with a party, coordinate with teammates to split tasks and speed up progression. In many games, early quests also unlock shortcuts or fast-travel options, so keeping an eye out for those can dramatically cut down travel time. The map’s layering also matters: some markers appear only after you clear certain areas, so if you’re stuck, switch to a broader map view to identify the next anchor point. As you become familiar with the layout, you’ll rely less on instinct and more on strategic planning to reach the next milestone quickly.
The beginner quest flow: accept, complete, report, and plan next steps
Once you find the starter quest, accept it from the quest giver and review the objectives carefully. Begin by completing the simplest sub-tasks first; this reduces risk and confirms you understand the mechanics without over-committing to complex tasks too soon. As you finish sub-objectives, return to the quest giver to report progress and receive any subsequent steps. This loop—accept, complete, report, and unlock next stages—repeats across most early quests and is a reliable pattern for building momentum. While completing tasks, keep a close eye on your resource pool (stamina, items, currency) and avoid unnecessary detours that don’t contribute to progress.
Additionally, some early quests introduce new tools or abilities. Take a moment to test these features in a low-stakes context, so you’re ready when the pace picks up. If a quest rewards you with equipment or gear, make sure to inspect the item’s stats to determine whether it fits your current build. The structured flow helps you stay organized and reduces the cognitive load of learning multiple systems at once. With regular practice, you’ll internalize the sequence and be able to complete starter quests quickly while maintaining a comfortable pace.
Common pitfalls and how to avoid them
Beginners often stumble into a few familiar traps when starting quests in Anime Vanguard. One common pitfall is rushing through quests without fully understanding the objectives, which leads to wasted time and missed rewards. A second pitfall is ignoring resource management—stamina, consumables, and inventory space can quickly limit your ability to complete a sequence. A third pitfall is poor map literacy: failing to use markers or misreading the UI can cause you to wander, wasting precious minutes. Finally, players sometimes neglect to check prerequisites, missing important steps that block progress later. To avoid these issues, adopt a calm, stepwise approach: read the objective, verify prerequisites, prioritize easy sub-tasks, monitor resources, and return to the giver after each milestone.
Pro tip: keep a small checklist of the top five things to do in any starter quest—accept, reach marker, collect required item, defeat the specified enemies, and report progress. If you get stuck, pause, review the objective notes, and reset your route. By maintaining a methodical approach, you reduce backtracking and improve your early-game efficiency. AniFanGuide emphasizes steady, deliberate practice rather than frantic sprints, which helps you build a sustainable rhythm that will carry you into more challenging content.
Rewards, progression, and planning your next move
Early quests often unlock new regions, access to better equipment, and improved training that accelerates your progress. We recommend focusing on completing starter quests before attempting harder tasks to ensure you understand the basics and don’t miss any essential rewards. After finishing a starting quest, review the loot and loot slots to decide which gear to equip or upgrade. The early rewards typically include experience, currency, and starter gear that support sustainable progression as you move into mid-game content.
As you accumulate experience and gear, plan your next steps by prioritizing quests that unlock new areas or introduce crucial mechanics you haven’t mastered yet. Consider pairing your questing goals with a light study of the game’s core systems—combat, crafting, exploration, and social interactions—to build a well-rounded skill set. AniFanGuide analysis shows that players who align their starter quests with their long-term progression plan tend to feel more engaged and less overwhelmed. Use this insight to pace yourself and avoid burnout in the early days of your journey.
Tools & Materials
- In-game account and region access(Ensure you can connect to the appropriate servers and access the starter area)
- Stable internet connection(Prefer 5 Mbps or higher for smooth gameplay)
- Notebook or notes app(Record objectives, markers, and rewards for quick recall)
- Stylus or controller (optional)(Helpful for precise navigation or combat but not required)
- Energy/stamina management tool(Use in-game UI or external tracker to plan resource use)
Steps
Estimated time: 20-25 minutes
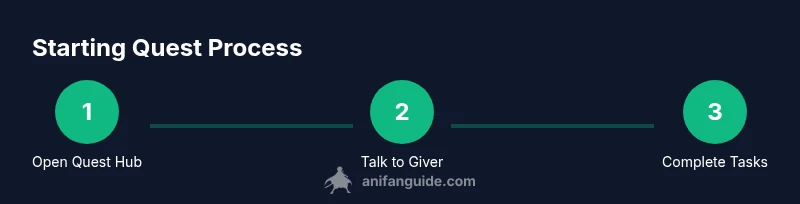
- 1
Open quest hub and locate starter quest
Launch the game and open the main quest hub or map. Look for the starter quest marker or glowing icon that signals the first assignment. If you don’t see it, switch to a broader map view and scan for nearby quest anchors.
Tip: Use the minimap filter to show only beginner quests to reduce clutter. - 2
Talk to the quest giver and review objectives
Interact with the quest giver NPC, then read the objectives carefully. Note any prerequisites you must complete before starting. Confirm you understand the rewards and the time you’ll have to complete the task.
Tip: If you’re unsure about an objective, pause and check the quest log for clarifications. - 3
Complete the prerequisites or sub-tasks
Work through the simplest sub-tasks first to build confidence and gather essential items. Avoid rushing; this helps you learn mechanics and reduces the chance of failing due to mistakes.
Tip: Early sub-tasks help you learn the map and combat patterns effectively. - 4
Proceed to main objectives and monitor progress
Advance through the main objectives, keeping an eye on your resource levels and time. If you encounter a difficult segment, retreat briefly, re-evaluate, and adjust your approach.
Tip: Keep a mental tally of which objectives you’ve completed to avoid backtracking. - 5
Return to the quest giver for reporting
When you complete the required steps, return to the quest giver to report progress and receive the next phase or reward. This feedback loop is essential for unlocking subsequent quests.
Tip: Reporting progress often yields additional guidance or new tasks. - 6
Claim rewards and upgrade gear
Accept rewards, inspect gear for stats, and equip anything that fits your current build. Prioritize items with upgrades that support your early-game goals, such as stamina or attack efficiency.
Tip: Compare gear stats to avoid equipping items that don’t improve your baseline performance. - 7
Plan your next quest
Choose a follow-up quest that unlocks new areas or introduces a mechanic you haven’t mastered yet. Align this choice with your overall progression plan to maintain momentum.
Tip: Keep a short-term goal list to stay focused and prevent aimless grinding.
Frequently Asked Questions
What should I do if the quest giver isn't available?
First check the map and nearby hubs for a reset or alternative quest. If the giver remains unavailable, try reloading the area or reloading the save. You can also consult the in-game help or community forums for known issues.
If the quest giver isn’t visible, check the map and nearby hubs, then reload or consult help resources.
How do I know when a quest is updated?
Quests typically update with new objectives in the quest log and may highlight new markers on the map. Check the objectives panel for any recent changes and ensure you’ve met all prerequisites before proceeding.
Look for new objectives in the quest log and map markers when a quest updates.
Are there rewards for completing beginner quests?
Yes. Beginner quests grant experience, currency, and starter gear to help you progress. Rewards scale with your level, so completing multiple starter quests accelerates your early growth.
Beginning quests reward experience, currency, and gear to boost early growth.
Can I abandon a quest and restart?
You can usually abandon a quest from the quest log, but some quests may restrict rewards if you abandon after accepting. Consider finishing or selecting a similar quest from a different giver if you’re uncertain.
You can often abandon, but rewards may be affected; weigh options first.
What if I fail a quest?
Failure typically lets you retry from a checkpoint or restart. Use the retry as a learning opportunity to practice mechanics and avoid repeating the same mistakes.
If you fail, retry from a checkpoint and learn from the mistakes.
How can I optimize my early progression?
Prioritize starter quests that unlock new areas and mechanics. Balance completing objectives with resource management, and use map markers to minimize backtracking.
Focus on starter quests that unlock new areas and teach key mechanics.
Watch Video
Main Points
- Identify prerequisites before accepting a quest.
- Find the quest giver using map markers.
- Review objectives to avoid detours.
- Return to the giver to claim rewards.
- Plan the next quest to sustain momentum.