How to Get Anime Eyes in Peak: A Step-by-Step Guide
Learn how to get anime eyes in peak expression with practical, step-by-step drawing techniques, shading, highlights, and a focused practice routine for bold, cinematic eye art.

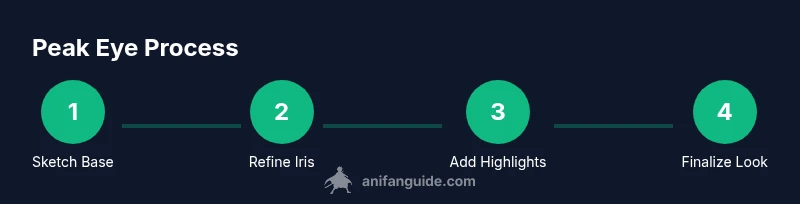
To get anime eyes in peak expression, you’ll follow a clear, repeatable workflow: study eye shape and proportions, exaggerate eyelids and highlights, and refine iris detail and shading. Practice with reference sheets, build a small library of eye shapes, and apply consistent lighting for bold, cinematic eyes. This method balances accuracy with stylized intensity.
Understanding the Peak Eye Look in Anime
In this guide on how to get anime eyes in peak, you’ll explore the moment when a character’s gaze carries maximum emotion. Peak eyes blend exaggerated shapes with clean readability, ensuring the reader instantly feels the mood. Start by identifying a few core shapes used across your favorite scenes and note how lighting affects each shape. The aim isn’t photo realism, but a clear, impactful read that reads well even at thumbnail size. With consistent practice, your line confidence will grow, and you’ll be able to reproduce a dramatic eye read across characters and scenes.
Anatomy of Anime Eyes at Peak Expression
Peak expression relies on a stylized anatomy where the iris often dominates the eye’s silhouette and the highlights carry the most energy. The sclera provides contrast; the iris is large and colorful, with a pupil sized to reflect the light source. A thin upper eyelid line and a slightly recessed lower lid help push the eye forward without flattening it. Consider how an audience perceives emotion from the eye alone—surprise, determination, or anger—then map that feeling onto the eye’s curvature, thickness, and highlight placement. Practice drawing a range of expressions to see how each feature shifts readability.
Establishing the Baseline: The Eye Sketch
Begin with a light construction of the eye using simple shapes: an almond outline, a central ellipse for the iris, and a circle for the pupil. This baseline helps you keep proportions consistent as you enlarge features for peak expression. Use a grid or guide lines to maintain symmetry when drawing both eyes facing the same direction. When satisfied with proportions, darken the outer edge and refine inner details gradually. A strong baseline makes later exaggeration easier without losing legibility.
Iris, Pupil, and Reflections for Impact
The iris is the heart of the gaze. For peak eyes, scale the iris larger than a standard cartoon eye, but avoid overwhelming the head. Position the pupil to reflect the light source, which adds realism to a stylized form. Crisper reflections—small white highlights—further sell the gloss of the eye. Place a primary highlight near the upper edge and a secondary one slightly lower to create depth. Try subtle color variations within the iris to communicate mood: cooler tones for intensity, warmer tones for excitement.
Eyelids, Brows, and Exaggeration: Conveying Emotion
Eyelids frame the eye and carry most of the expression. In peak eyes, the upper lid often thickens and curves more dramatically, while the lower lid may retreat to reveal more scleral white. Brows should mirror the emotion—furrowed for focus, arched for surprise, or relaxed for confidence. Maintain a clear silhouette by keeping the brow line above the eye, which helps the gaze read clearly at small scales. Practice quick thumbnail sketches to dial in the right balance between readability and exaggeration.
Shading and Color: Depth and Mood
Depth comes from shading the eye socket, eyelids, and the bridge of the nose. For peak eyes, use midtones along the crease and stronger shadows along the lash line to reinforce shape. Iris color choice deeply influences mood: blues read sharp and cool, greens can feel intense or hopeful, and warm ambers convey energy. Use gradient shading to create volume instead of flat fills. Test your color choices against different backgrounds to ensure good readability in scenes.
Highlights, Sparkles, and Peak Moment
Highlights are essential for the dramatic peak eye look. Use crisp reflections on the iris and a bright highlight on the eyelid to simulate gloss. Sparkles can read as energy but should be used sparingly to avoid clutter. The key is consistency: place highlights where they will stay legible when the eye is scaled down for panels. Regularly check your eye reads at thumbnail size to ensure they retain impact.
Composition: Eye Position, Tilt, and Interaction with Hair
Eye placement and tilt influence how a gaze reads in a scene. A slight head tilt can amplify determination or mischief, while a wide gaze often signals surprise. Consider how hair frames the eye and interacts with the brow; strands crossing the eye line can create dynamic energy. For panel planning, sketch alternate poses from multiple angles and compare how the peak eye reads from each viewpoint.
Common Mistakes and How to Fix Them
Overworking the iris, inconsistent lighting, and mismatched highlights erode readability. Uneven eyelid thickness can throw off expression, and stray lines distract from the focal point. To fix this, compare both eyes side by side, verify the light source, and simplify any extraneous lines. Use reference sheets and get feedback from peers to accelerate progress.
Practice Plan to Reach Peak Eye Style
A structured practice plan accelerates mastery of peak anime eyes. Start with 15 minutes of daily focused study, rotating through shape, shading, and highlight drills. Each week, add a variable: a new eye shape, color, or lighting. Maintain a small gallery and annotate what works and what doesn’t. Over six to eight weeks, expect stronger consistency, bolder expressions, and clearer peak eyes across characters.
Tools & Materials
- Drawing tablet or sketchbook(Essential for both traditional and digital workflows.)
- Pencils (HB and 2B)(Use a light grade for construction and a darker grade for final lines.)
- Eraser (kneaded and cap)**(Kneaded eraser helps lift graphite for soft highlights.)
- Ruler or light grid for symmetry(Optional but helpful for consistent spacing.)
- Color tools (colored pencils or digital brushes)(Choose tools compatible with your workflow.)
- Reference sheets(A library of eye shapes and expressions speeds practice.)
- Lightbox (optional)(Useful for tracing while studying anatomy.)
- Preferred software (Clip Studio Paint, Photoshop, Krita)(Digital workflow enhances flexibility.)
Steps
Estimated time: 40-60 minutes
- 1
Sketch the base eye shape
Start with a light almond shape and a central ellipse for the iris. Keep lines faint so you can adjust proportions without leaving heavy marks. Establish symmetry with a guiding line or simple grid.
Tip: Light construction lines are easier to adjust than dark final lines. - 2
Position lids and brows to frame the look
Outline the upper and lower eyelids, placing the brow line to reflect the intended mood. Ensure the gap between lids supports the eye’s size and expression. Use gentle curves to avoid stiffness.
Tip: Match the brow tilt to the expression you’re aiming for. - 3
Define iris and pupil with peak proportion
Draw the iris larger than a standard eye, keeping the pupil centered to reflect the light source. Lightly sketch catchlights to guide highlight placement.
Tip: Keep the pupil slightly off-center if the gaze shifts. - 4
Place reflections and add specular highlights
Mark crisp highlights on the iris and eyelid to convey gloss. Add a secondary highlight lower in the iris for depth.
Tip: Avoid overdoing highlights; too many can look cartoonish. - 5
Shade the eye socket and surrounding area
Apply shading around the eye with a focus on contrast at the upper lid and lash line. Use a soft gradient to avoid harsh edges.
Tip: Check lighting from multiple angles to confirm depth. - 6
Refine edges and line weight
Darken outer edges selectively to enhance silhouette while keeping inner lines light. Balance line weight to retain readability at small sizes.
Tip: Use heavier lines for close-up poses and lighter lines for distant shots. - 7
Apply color and gradient shading
Color the iris with a gradient, add midtones around the eye to suggest depth, and blend smoothly to prevent flat areas.
Tip: Test color choices against background tones for readability. - 8
Adjust pose and tilt for peak expression
Experiment with a slight head tilt and eye angle to maximize emotional impact. Compare several options and pick the most expressive.
Tip: Record quick references to track your progress.
Frequently Asked Questions
What is peak eye expression in anime?
Peak eye expression shows the moment of maximum emotion for a character, using exaggerated shapes, highlights, and reflections to convey intensity. Practice with reference frames and compare scenes to identify which features signal peak energy.
Peak eye expression is the moment of maximum emotion, shown through exaggerated shapes and highlights.
Do I need digital tools to create peak anime eyes?
No. You can achieve this look with traditional media or digital software. The key is consistent practice, clean lines, and decisive shading.
You can do this with traditional or digital tools; practice matters most.
How long does it take to learn this look?
Progress depends on practice frequency. Most artists see improvements after several weeks of focused study, with noticeable gains after two months.
It varies, but consistent practice shows results in weeks to months.
What are common mistakes to avoid?
Overworking the iris, inconsistent lighting, and mismatched highlights erode readability. Keep a simple baseline and test across sizes.
Common mistakes include over-detailing and misaligned lighting.
Can these techniques apply to other styles?
Yes. The core ideas—shape, proportion, and highlights—translate to other stylized eyes; adjust for the target style.
Absolutely; adapt the techniques to different anime styles.
Watch Video
Main Points
- Study peak eye shapes and proportions.
- Exaggerate highlights for intensity.
- Practice consistently for steady progress.
- Reference real anime eyes while stylizing.