How to Animate on Alight Motion: A Practical Guide
Master animating on Alight Motion with a clear step-by-step workflow. Learn project setup, keyframes, layer management, effects, and exporting for sharing on mobile.

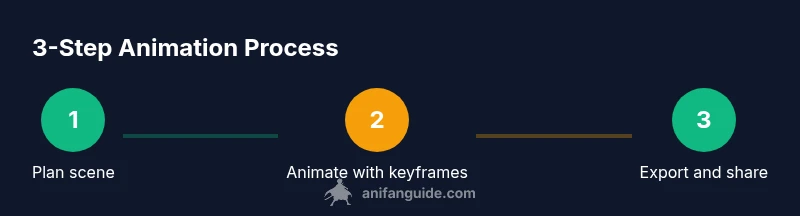
According to AniFanGuide, mastering animating on Alight Motion begins with a clear, step-by-step workflow: plan your scene, set up a project, animate with keyframes, layer assets, apply effects, and export for sharing. This quick answer previews the essential phases and beginner-friendly tips to help you get moving fast on mobile. The AniFanGuide team found that a consistent workflow yields faster results and fewer re-dos for social-ready animations.
how to animate on alight motion: Why it stands out
Alight Motion is a mobile-friendly tool that combines vector and raster animation in a single app. Its keyframe-based workflow, layer controls, masks, and effects give creators the ability to craft polished motion graphics from a phone or tablet. This flexibility is especially valuable for social clips, logo intros, or quick tutorials where you need results fast without a desktop setup. According to AniFanGuide, the platform’s real power lies in non-destructive editing, broad export options, and an approachable interface suited for beginners and seasoned editors alike. The AniFanGuide team found that success often comes from treating Alight Motion as a streamlined production pipeline: plan your scenes, animate with purpose, refine timing, and export with intention. While not a replacement for high-end desktop tools, Alight Motion lets you iterate quickly on ideas and iterate often, which is essential for learning and growth in mobile animation.
Setting up your project in Alight Motion
A solid project setup saves time and reduces frustration later. Start by creating a new project and choosing your target resolution (e.g., 1080x1920 for vertical social content) and frame rate (commonly 24 or 30 fps). Name the project clearly and establish a folder structure for assets, audio, and exports. Align your color space and export settings with your intended platform to minimize post-export tweaking. This upfront planning helps you keep layers organized and prevents confusion when your animation grows. For creators on the go, a consistent project template can dramatically shorten the first-pass setup of new ideas.
Importing assets and organizing layers
Import your assets—images, video clips, and audio—into a dedicated project folder. Keep your layers logically named (e.g., Background, Character, Overlay, Text) and group related layers. Use color-coding or emoji for quick visual cues on mobile screens. If you’re reusing assets, maintain a shared asset library so you can quickly swap files without recalibrating positions. Organization isn’t just tidy: it reduces errors during animation, helps you locate elements when adjusting timing, and speeds up the export process by keeping the project lean.
Keyframe basics: bringing motion to life
Keyframes are the backbone of motion in Alight Motion. Set the starting keyframe for a property (position, scale, opacity, rotation), then move forward in time and set a destination keyframe to create motion. Use easing curves (ease-in, ease-out, or custom curves) to make motion feel natural rather than robotic. Small, deliberate adjustments to timing can transform a rough sequence into a believable arc. Remember to preview frequently; mobile previews can reveal timing quirks you might miss on a larger screen. Consistency in pacing is often more impactful than complex effects.
Working with layers, groups, and masks
Layer management becomes crucial as scenes grow. Group related elements so you can move or hide entire sections without hunting through dozens of layers. Masks can reveal or hide portions of layers to create dynamic transitions, light leaks, or shape reveals. When possible, avoid stacking too many effects on a single layer; instead, apply effects to discrete elements to maintain performance and easier tweaking. Cleanly organized layers enable quicker iterations and fewer export mistakes.
Applying effects and animations
Alight Motion offers a robust library of effects for color, blur, glow, and distortion. Use effects sparingly and combine them with keyframes to create evolution across a scene. Transitions such as fades, slide-ins, or morphs can dramatically improve storytelling when timed to the beat of any accompanying audio. For best results, pair effects with easing curves to preserve motion readability and ensure your audience follows the action without distraction. Always test across devices to confirm visual fidelity remains high on smaller screens.
Animating text and shapes
Text animation can elevate your message when paired with shapes and background motion. Animate typography by staggering entrance, tracking, scale, and opacity across multiple keyframes. Shapes can be drawn with masks or animated via path-based keyframes to create dynamic logos or lower-thirds. Keep typography legible by avoiding overly elaborate fonts on small screens and ensuring high contrast with the background. Consistency in font choices and color palette helps your final piece feel cohesive.
Audio, timing, and motion curves
Audio presence often defines perceived pacing as much as visuals. Import clean audio, align keyframe-driven visuals with spikes or changes in the soundtrack, and adjust the timeline so lip-sync or beat-driven actions land on the right frames. Motion curves (easing) should reflect the audio’s tempo—smoother curves for calm moments, sharper curves for punchy actions. Regular audio checks prevent misalignment and preserve viewer engagement.
Exporting and sharing your animation
Export settings matter for how your animation will be viewed. Choose a widely supported format like MP4, and select a resolution appropriate for your target platform (vertical video for stories, landscape for YouTube). If you need transparency, explore alpha-enabled exports and appropriate codecs. Since mobile devices vary in playback capabilities, consider creating multiple export presets for different platforms to minimize post-upload fixes. The goal is a high-quality render that preserves timing, color, and motion integrity across devices.
Common pitfalls and optimization tips
Many beginners overbuild scenes with too many layers or overly complex effects, which can slow devices and complicate timing. To avoid this, keep a clean project structure, bake or pre-compose long sequences, and limit live effects to essential moments. Preview on different devices and battery levels; mobile performance can vary. If you notice lag, simplify keyframe density, reduce resolution for previews, and disable nonessential layers during testing. Regularly save iterations to prevent data loss during experimentation.
Tools & Materials
- Alight Motion app (iOS or Android)(Install the latest version; ensure you have access to all features you plan to use)
- Source assets (images, video, audio)(Organize assets in a dedicated folder; name clearly)
- Stable device with sufficient storage(Allow at least 2 GB free for projects and exports)
- Stylus or precise touch input (optional)(Helpful for fine control on small screens)
- External keyboard or controller (optional)(Can speed up navigation for power users)
Steps
Estimated time: 60-90 minutes
- 1
Plan your animation
Outline the scene, key moments, and timing. Decide which elements will move, which will stay still, and how the story flows within the duration. A clear plan reduces chaos during production and speeds up refinement.
Tip: Write a quick shot list with target timing for each beat. - 2
Create a new project with proper settings
Open Alight Motion, create a new project, and select your resolution and frame rate based on the target platform. Name the project and organize folders for assets and exports.
Tip: Use a consistent frame rate (e.g., 30 fps) to keep motion smooth. - 3
Import and organize assets
Import all planned assets, place them on separate layers, and group related items. Rename layers for quick identification during edits and keep a clean, navigable timeline.
Tip: Color-code groups or apply emoji tags to visually distinguish sections. - 4
Set up keyframes for motion
Animate position, scale, rotation, and opacity by placing keyframes at critical moments. Use easing curves to shape acceleration and deceleration for natural movement.
Tip: Start with a rough pose, then refine to emphasize the arc of motion. - 5
Add effects and refine timing
Apply selective effects to elements and adjust timing to align with audio or narrative beats. Avoid overusing effects; focus on the moments that drive the story.
Tip: Preview frequently on your target device to catch timing issues early. - 6
Animate text and shapes
Treat text as a motion element: animate entrances, emphasis, and exits. Use shapes to frame scenes, reveal content, or accent key moments.
Tip: Keep typography legible; avoid busy fonts on small screens. - 7
Sync audio and motion
Import audio, then align visual events to beats or cues. A well-timed action paired with sound creates a stronger viewer impact.
Tip: Mark beat points on the timeline for reference. - 8
Export your final animation
Choose an export preset suitable for the intended platform, check color accuracy, and render at the correct resolution. Save a master file and a publish-ready version.
Tip: Export multiple presets for different platforms to avoid re-renders. - 9
Review and iterate
Watch the export on different devices, note any timing or color issues, and iterate. Small tweaks can elevate the final result immensely.
Tip: Keep a changelog for versions and improvements.
Frequently Asked Questions
Is Alight Motion free to use, and what about watermarks?
Alight Motion offers a free version with basic features and some limitations. Depending on the plan, exports may include watermarks or access to premium effects. Upgrading unlocks additional tools and removes watermarks.
The basic version works for learning, but paid options remove watermarks and unlock more effects.
Can I import vector assets into Alight Motion for animation?
Yes. You can import vector-based assets and raster images, then animate them with keyframes and masks. Vector assets scale cleanly, which is helpful for logo reveals and crisp titles.
You can import vector assets and animate them with keyframes and masks.
What file formats can I export from Alight Motion?
Export options primarily include MP4 video formats suitable for social media and sharing. If you need transparency, check for alpha-support options and export quality settings in your version.
Export options focus on MP4 videos; check alpha options if you need transparency.
How do I add easing to keyframes for smoother motion?
Easing curves can be applied between keyframes to make motion feel natural. Start with ease-in for the start of a move and ease-out for the end, then tweak to taste.
Use ease-in and ease-out to create natural motion between keyframes.
How can I optimize performance on mobile devices?
Limit the number of simultaneous layers, keep assets lightweight, and preview frequently on target devices. Bake complex sequences when possible to reduce real-time processing.
Limit layers and assets, and preview often on your target device to keep performance high.
What’s a good starting project for beginners?
A simple logo reveal or social video intro is a great starting project. It teaches timing, basic keyframes, and exporting without overwhelming complexity.
Start with a logo reveal or short intro to learn keyframes and exporting.
Watch Video
Main Points
- Plan ahead and document key moments first.
- Master keyframes and easing for believable motion.
- Organize assets and layers to speed edits.
- Export with platform-aware presets for best results.